| This article is a stub. It is short and in need of fortification. Why not help out? |
| Overview | BF2 | 2142 | Online | P4F | BF3 |
|---|
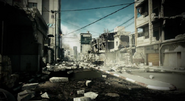
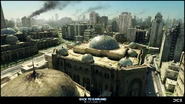
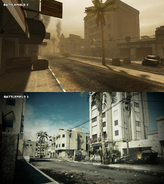
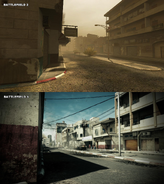
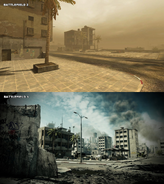
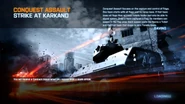
Strike at Karkand is a map featured in Battlefield 3: Back to Karkand expansion pack. It is a re-imagined version of the Battlefield 2 map using the Frostbite 2 engine, and is playable on all game modes. Strike at Karkand, like the other maps in the expansion, is significantly more war-torn, with a background city-landscape that was not present in Battlefield 2's version of Karkand.
Conquest Large[]
US Deployment[]
The US deployment is not much more than a few houses on either side of a long road leading into the city. There is only a small line of trees blocking the lines of sight for teams to avoid combat. The deployment only contains two armored vehicles to strike the enemies guarding the city. US soldiers must act fast to avoid being pinned down at the road leading to the hotel as most to all of the RU soldiers set up an ambush at the Hotel. A good tactic to use when pinned down is to move along the rocks on the east side of the road and flank enemy flags to create an opening for allies to attack the defending Russians.
The following vehicles spawn here:
RU Deployment[]
A: Hotel[]
The Hotel is the first area of conflict in every match. Russian soldiers must set up a defensive line by the Hotel to stop the oncoming US armor and infantry. The tank and LAV are usually first to arrive at the Hotel beginning the attack. Mines should be placed along the road to counter the armor allowing the vehicles to inevitably blow up or be trapped at the deployment due to the only entrance for vehicles to be blocked off. The Hotel is usually defended by snipers at the Square who pick off infantry and laser designate enemy armor for AT soldiers. Once the US capture the Hotel it becomes a forward deployment zone and begins to lack combat.
B: Square[]
The B flag is located next to a tall building that has a ladder that leads to the rooftop and has a small market place in the middle with what appears to be a well. It is often protected by snipers and support troops on the buildings surrounding the flag. Much of the action takes place at this flag and is accessible by both vehicles and infantry, making it a hard flag to keep for long.
C: Market[]
The Market objective is located near the Square and is accessible from B by a flight of stairs. The surroundings are filled with buildings where infantry can hide and ambush any incoming hostiles, especially vehicles. Controlling B eases capturing and holding C because of the advantage position it has over that flag.
D: Suburb[]
Another strategic hotspot, as it is accessible directly from the US spawn by going to the side. It features multiple two-floored buildings with a road trailing through the middle, connecting points E and B. It also possesses a high ground, making the buildings and nearby terrain a common overwatch point for Recon players with sniper rifles. It also overlooks the C and B objectives. If somehow being defended, it's the hardest flag to capture.
E: Train[]
It's situated between the road that links the suburbs to the Gatehouse and the Warehouse. The wagons standing on the rail tracks provides good cover for the infantry defending the flag, but are always exposed to fire coming from F, G or D and C, depending on which side of the railway you are staying. The flag itself is easily accessible to vehicles, making it probably the most contested flag of the map.
F: Warehouse[]
G: Gatehouse[]
Act as the deployment of the Russian team, often the attackers will try to rush with their LAV-25 to this flag to it to gain the extra armored vehicles it provides. Here spawns 1 heavy and one light armored for any team that controls it.
Conquest Small[]
US Deployment[]
Same as in 64 player variant.
RU Deployment[]
A: Hotel[]
Same as in 64 player variant.
B: Square[]
Same as in 64 player variant.
C: Fountain[]
The Suburb flag from the 64-player map is moved down the road and closer to flag B (Square), in a smaller square mostly surrounded by tall buildings. It has close proximity to both the Square and Market flags, as well as controlling a road that leads straight to the Compound/Train, and access to an outside path to the Hotel and US Deployment. This makes it a crossroads of the city, and holding this flag can be very useful for mounting assaults on other key areas of the map. The villas on the hill overlooking the flag are a popular defense and lookout point for snipers and support gunners.
D: Market[]
The Market objective is located near the Square and is accessible from B by a flight of stairs. The surroundings are filled with buildings where infantry can hide and ambush any incoming hostiles, especially vehicles. Controlling B eases capturing and holding D because of the advantage position it has over that flag.
E: Compound[]
It's situated on the roads coming from both D and C. The railroad cars standing on the tracks provide good cover for the infantry defending the flag from attackers and give defenders opportunity to take enemies by surprise, but are not within the flag control radius itself. The flag itself is easily accessible to vehicles coming from the Market or Fountain.
Conquest Assault[]
Rush[]
Squad Rush[]
Team Deathmatch[]
Squad Deathmatch[]
Gallery[]
Trivia[]
- There is a radio in a building near base D playing the MEC loading theme.
- At the very beginning of Conquest Assault matches, a F/A-18 will quickly pass right over the map and will bomb the hotel at the A flag. The explosion will create a considerable amount of rubble that may eventually kill any player in the capture radius (except for those hidden in the entrance).
- The map has the same loading music as Tehran Highway.
- The MAV coordinates state Karkand is located in Kuwait City, Kuwait. Based off the geography (water location, single road leading up to the city, etc.), it is safe to assume DICE based Karkand off the industrial area of Kuwait City.
- Cardboard boxes found in alleyways or the market C are marked MICE in the same font as the DICE logo. These boxes can also be found on Gulf of Oman and several other maps, as well as in Battlefield 4.
- Some cargo crates can be seen with the serial numbers "2143", referencing Battlefield 2142 and teasing a possible sequel.
- It is the only map in the Back to Karkand expansion map that does not feature aircraft, not counting the scripted dynamic event in the beginning of a Rush match.
| ||||||||||||||||||||||||||


