| This article is a stub. It is short and in need of fortification. Why not help out? |
— Official description
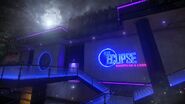
Code Blue is a map featured in the Battlefield Hardline: Criminal Activity expansion. The map takes place in the Blue Eclipse nightclub located on an artificial island outside of Miami city, as Law Enforcement raid it to stop Criminals operating out of it.
Overview[]
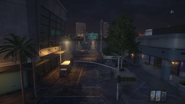
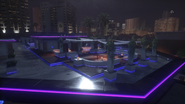
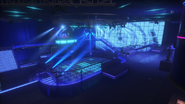
As far as islands go, the roughly oblong landform is rather small at around 300m wide and 450m long, however the area is heavily built up with commercial infrastructure, including shops, restaurants, warehouses, and offices. Many of these storefronts act as solid walls, but some have modelled interiors and are enterable. These areas are divided by single carriageway streets and crossroads, alongside paved pedestrian only pathways, to form three distinct city blocks around which the map's Conquest objectives are based. Along with these pre-built structures, development work on the island is continuous, evidenced by a large construction site to the northeast. Much of the center of the island is taken up by the Blue Eclipse, a large nightclub set within a stepped plaza. Comprised of three storeys, including a rooftop lounge, both the interior and exterior of the bar blazes with blue neon, visually striking compared to the well-lit but comparatively drab surroundings of tile and concrete.
The majority of the island's area is accessible, allowing players to walk along the waterfront on the north and south sides, whilst the remaining two are blocked by impassible buildings. Players are forbidden from actually entering the water by an indestructible iron fence, and access to the surrounding jetties, and lone bridge in from the illuminated cityscape across the waters, are cut off.
The size of the map makes Hotwire prohibitively impractical, and restricts vehicles to only one or two per team in other gamemodes.
Conquest[]
Both Conquest and Conquest Large are fought between three flags.
The Undercover and Thieves are provided a Mobile Command Post and Syndicate Crew Cab, respectively, as their only available vehicles. Additional vehicles spawns are granted upon capture of the two end objectives, although they are severely limited and number making foot travel the general mode of transport between objectives.
Undercover Deployment[]
The police deploy from the southwest corner of the map, in a shopping center known as Graci Plaza. The lane, enclosed along its length by storefronts, has exits to the bridge street on the north side and south side. A footpath through a line of buildings to the east gives access to the street that separates the zone from the Food Court.
Thieves Deployment[]
The criminals start inside the gated-off Hammerhead industrial estate in the map's northeast. The area is smaller and more enclosed than the Law Enforcers' spawn, with two road exits to the northwestern Construction Site and southeast. Corridors running through the bottom floor of a doctor's surgery give infantry a way out to the west and south.
Flags[]
A: Construction Site[]
The Construction Site is in the north section of the map. The project is for a twin row of buildings leading back from the road north of the Blue Eclipse, with a road or footpath running vertically between them. As it stands, the pathway is still only a dirt road through the center of the site, which is comprised of an unfinished assortment of concrete pillars, iron crossbeams, moulded walls and construction materials. The skeleton of the two buildings aside the dirt road offer decent directional cover due to its complement of outer walls, but with large sections of walls still to be erected they are easily accessible from most sides. The southern portion of the site facing the road is mostly complete, with scaffolding around twin two-storey buildings granting access to the incomplete "roof" - a useful elevated position over the flag and adjacent streets, which loop around the whole exterior of the site. The capture radius, although not extending to the roof, generally falls within the boundaries of the site marked with green fencing.
A Utility Van can be spawned on once the flag is captured by a team. A Nail Gun is found atop the southwestern building, which can be reached by climbing the scaffolding or by crossing the beam linked to the opposite structure on the east side of the dirt road.
B: Club Lounge[]
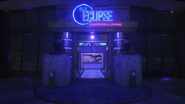
The Club Lounge flag is the only indoor objective on the map, located inside the Blue Eclipse nightclub in the center of the map. The club is a large building with many entrances, including the main entrance on the west side, two service entrances to the east through a parking lot, and ground floor emergency exits on the north and south side. Illuminated exterior staircases along these sides also take players up to a second floor balcony, with more emergency doors. Finally, the roof can be reached using a ladder by the rear entrance, or by either stair or lift access from inside the club.
The Club itself can be split into three parts, determined by level in the building. The ground floor contains a bar past the main foyer, with hallways leading through a mesmerising tunnel entrance onto the dance floor at the back of the club. The main foyer is flanked by hallways, and has stairwells up to the second floor. The flag's capture zone is found here, centred around the VIP lounge at the heart of the club. While the flag can be seized from outside, the enclosed room can offer a highly defensible point of contest due to its indestructible walls and limited entry points - however, a skylight in the ceiling allows players to drop themselves or ordnance in from the rooftop lounge.
A unique concern in this area is the almost incessant blaring of techno music, which can mask player footsteps and actions such as opening doors.
Outside the club, two Grappling Hooks can be found; one is by a statue to the north of the main entrance, the other inside a security booth in the rear parking lot. The pickups can be used to infiltrate the club from the roof. Additionally, an MG36 is located underneath the stairs on the ground floor of the roof access stairwell, and a Zipline has been left on the bar of the rooftop lounge.
C: Food Court[]
The Food Court is on the map's southern end. Known as The Atrium, the area is a trapezium of buildings surrounded by an outer road, with foot access entrances on each of the four sides. The paths lead inwards past several styles of restaurants however the majority of these are inaccessible, with the exception of an outdoor beer garden on the north side and a taco shop to the west, convening in a central, square refectory that acts as the anchor point for the capture radius. Inside, sight lines are partially restricted by the sharp corners of the paths inward although the square itself, full of outdoor dining furniture such as tables and chairs, is severely lacking in cover. Control of the flag is better kept by keeping enemies from entering in through the four paths. Despite being outside the control zone, ladders around the exterior perimeter allow players onto the roofs of the adjacent eateries, giving a significantly better viewpoint into the enclosed plaza.
A Utility Van spawns on the objective once captured. A Nail Gun can be found nearby, behind a fence on the south side of the block, which must be destroyed to pick it up.
Heist[]
In Heist, Undercover Police are tasked to respond to a robbery attempt at the Blue Eclipse nightclub, where thieves are planning to make off with high value assets stored inside the VIP lounge.
For vehicles, each team has only their Mobile Spawn Point with no neutral vehicles. Battle Pickups are present, and are the same as in Conquest.
Deployments[]
Undercover Deployment[]
The Police's initial spawn point is inside the Minuten boutique across the road from the club's west side main entrance. Once the criminals effect a break in, their spawn reverts to their usual Conquest deployment in Graci Plaza a block away to the south.
Thieves' Deployment[]
At the start of a round, the Thieves start in the parking lot on the opposite side of the club, directly outside the service entrance, and with staircases up to the second floor lounge immediately in front of them once inside. When the explosives are placed, they too have their spawn changed to its Conquest location, in the Hammerhead estate to the northeast.
Break-In[]
With both bags of loot located inside the VIP Lounge, only one entrance must be blown open, although three doorway entrances are available. The rooftop skylight can also be breached for an assault from above - once a player drops in, the doors become capable of being unlocked from the inside.
At this stage, control of the upper floor of the club becomes vital as it allows players access to the objective room and to project fire over the exposed dance floor and ground floor bar. After the deployments are moved, control over the whole club becomes priority.
Escape[]
Blood Money[]
In Blood Money, revellers flee as teams of Law Enforcement and Criminals descend upon the Blue Eclipse in an attempt to extricate as much cash as possible from the private section of the nightclub. As in other large gamemodes each side receives a Mobile Spawn Point as their only vehicle, forcing bagmen to run most of their relays on foot.
Deployments and Vaults[]
Undercover[]
The Undercover team deploys from their usual Conquest deployment at Graci Plaza, with their Vault located in the center square of the nearby Food Court.
Theives[]
The Thieves deployment is the same as in Conquest, at the Hammerhead industrial sector. The Thieves Vault is at the Construction Site.
Money Pile[]
The Money Pile is in the VIP Lounge on the second floor of the nightclub. The room is easily fortified due to its small number of entrances, but surrounding it from the outside can trap enemies inside with nowhere to run. As a result, teams should focus on a more active defense of the room using a wider perimeter, as well as exploiting the rooftop skylight entrance.
Rescue[]
In Rescue, club goers are taken hostage by a criminal gang in the middle of the establishment's open hours. The Blue Eclipse is evacuated, and as negotiations break down a squad of Undercover police assemble to resolve the situation with force. Map boundaries are restricted to the central plaza where the club is situated, allowing the full interior and exterior of the club to be explored but cutting off all other adjacent areas of the island.
The Police spawn directly outside the main entrance of the club with the escape car on the road to the west, while the criminals spawn inside on the second floor, between the VIP Lounge and the dance floor. Both hostages are on the same floor, with number one being positioned behind the bar towards the front of the club and number two being held inside the VIP room itself. The many entrances into the building give the Undercover team generous options for their initial approach, but gaining access to the restrictive and less covered second floor can prove troublesome. Although the Zipline on the roof is absent in this gamemode, the two Grappling Hooks located around the base of the structure can enable more dynamic entries into the establishment.
Crosshair[]
When a Miami drug cartel member is the victim of a high-profile arrest while out clubbing, both the press and his criminal associates take notice, the latter seeking to prevent him falling into police custody at any cost. Crosshair takes place in the southern section of the map, with everything north of the bridge street cut off from play. A Nail Gun is the single Battle Pickup on this map.
The Police escort deploy from the middle of Graci Plaza, while the Hit Squad start two streets away near the eastern edge of the island. The two escape points are within the Food Court. Objective A is inside the fenced-off beer garden the north; objective B is at the far end of a side street off to the south of the Food Court. The map is small - the police start just over 100m away from each extraction point, with objective B being in a virtually straight line from their deployment. This leaves the criminals little time to react, and must attempt to either ambush the VIP when they are most vulnerable, such as when crossing a street or passing through the tight alleys of the Food Court, or by racing to cover each extraction point and directly defending them.
One of the VIP's weapon cases is inside the spawn area.
Team Deathmatch[]
After a raid on a Miami hotspot goes awry, shooting erupts all over the artificial island where it is based. Team Deathmatch takes place across the entire length of the map, with only the Conquest deployment areas cut off from play. Battle Pickups are unchanged from their regular configuration.
Bounty Hunter[]
Bail Jumpers make their dramatic last stand in the vicinity of an elite nightclub after police close in on the area. Bounty Hunter uses the same map boundaries as Team Deathmatch, as well as standard Battle Pickups.
Gallery[]
Trivia[]
- In the game files this map is named xp1_nights. The into/loading music song is "'Fixed Income" by DJ Shadow.
- Code Blue and The Beat are therefore the only maps outside of Battlefield Vietnam and Battlefield: Bad Company 2: Vietnam to use licenced songs as their loading/intro music.
- The songs playing in the nightclub are "Sleak Peak" by Gerhard Schultz, "Pitch in Time" by Gerhard Schulz, and "Lose Control Dear" by Andreas Pique.[1] [2][3]
| ||||||||||||||||||||


