- This item has a Codex entry: Fort De Vaux
— Battlefield.com Description
Fort De Vaux is a map featured in the Battlefield 1: They Shall Not Pass expansion. It takes place during the Battle of Verdun in the German raid of Fort de Vaux in 1916.
Overview[]
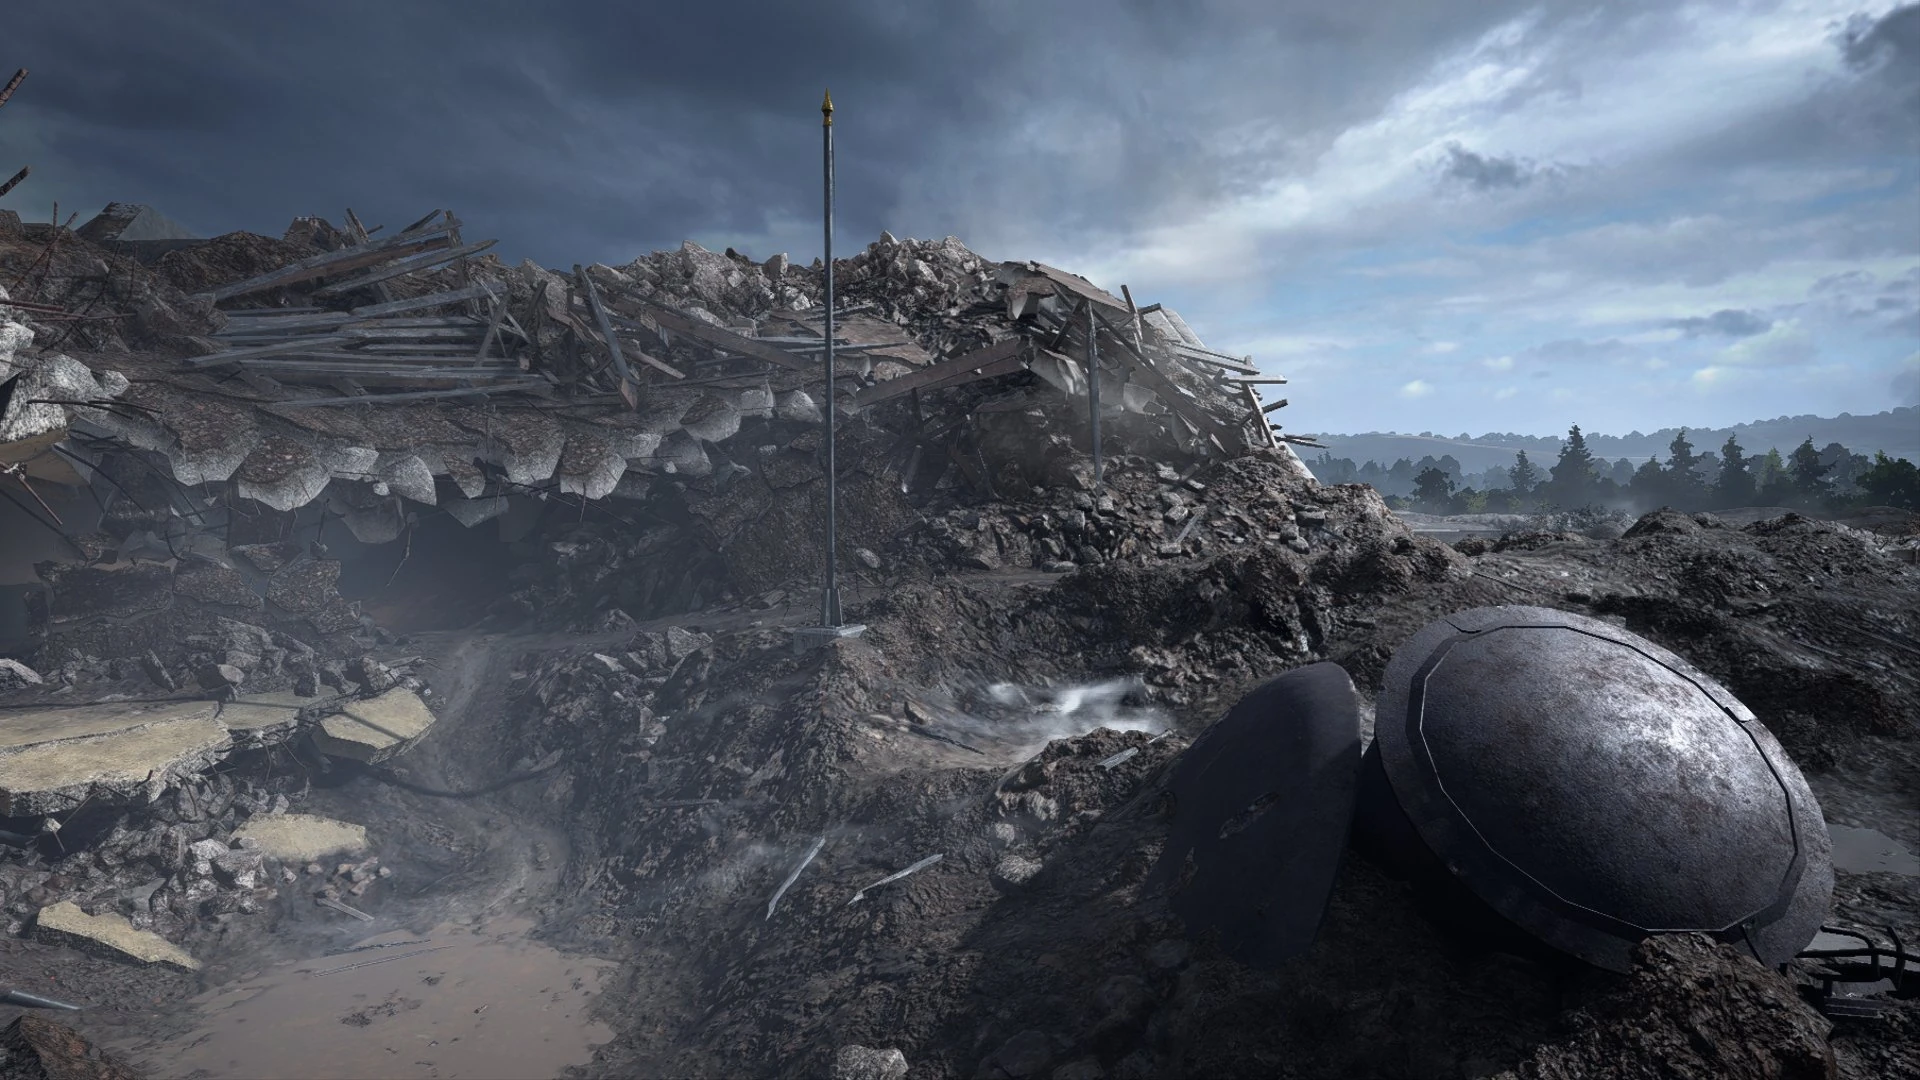
Fort Vaux is situated on a previously grassy hilltop voided of life by a massive artillery barrage. The southern approach is lined with ravaged trench lines leading up to the fort that suggest the gains achieved by the Germans prior to combat within the fort itself, and even as the assault is made, shells continue to fall on the roof of the complex. Forest fires rage throughout the surrounding countryside.
The fort itself is trapezoid-shaped, around 200m long and 260m wide, and is surrounded by a deep, dry moat. The west side of the moat is completely inaccessible, preventing a full circuit of the fortress perimeter. These paths outside of the fort allow forces to bypass blocked interior paths, but they also provide plenty of sight to long-ranged weapons. The roof of the structure, which covers almost all of the interior except the open Central Courtyard, is also unreachable, the earth cover being as thoroughly pulverised as the ground-level exterior terrain. Originally constructed with entrances only on the north side, the bombardment has blasted holes at various points around the outer walls, providing multiple access points to the complex interior.
Inside, Fort Vaux is a maze of narrow corridors, branching hallways, and rooms almost universally secured with lockable steel doors. Parts of the fortress interior appears generally untouched, however in other places the fortress has crumbled under the barrage, completely collapsing some corridors and filling the rest with flaming debris. Despite this destruction, the interior is well lit with functional electrical lighting and cracks in the ceiling that let in daylight.
The fort features no vehicles nor defensive emplacements aside from the occasional heavy machine gun—all combat is strictly between infantry. Returning from the Battlefield 3: Close Quarters expansion is the use of multiple minimap layers, one for the exterior, and a number for split levels of the interior.
Behemoth[]
Instead of a Behemoth, four Elite Kits spawn for the losing side: one Flame Trooper kit, one Trench Raider kit and two Sentry kits, one wielding the Villar Perosa, the other wielding the MG 08/15.
Control Points[]
| Control Point | Frontlines | Conquest | Domination | Operations | Rush |
|---|---|---|---|---|---|
| South Deployment | |||||
| Main Defense Line | 1A | ||||
| Trench Line | A | ||||
| Command Post | 1B | Sector 3B | |||
| Generator Room | B | A | Sector 3A | ||
| Central Courtyard | B |
A | 2A | Sector 2B | |
| Breach | C | C |
C | 2B | Sector 2A |
| Barracks | D | B | 3B | Sector 1B | |
| Ammo Depot | E | 3A | Sector 1A | ||
| North Deployment |
Conquest[]
The entire fort is contested in Conquest. All of the five flags are found either inside the main structure or directly outside entrances to said interior. Combat encounters are generally made at extremely close range, with grenades and other explosives seeing heavy use for their room-clearing ability, or to knock down sealed doors. Exterior routes around the east section of the moat allow players to bypass chokepoints and other areas of resistance.
Deployments[]
German Deployment[]
The Germans start outside the fort's south side, amongst the shattered trenches and pillboxes of the Main Defense Line. Their nearest routes into the fort are through breaches in the inner walls of the moat, two of which are located at the southeast corner and lead directly to the Generator Room.
")
")
")
French Deployment[]
The French Deploy on the reverse slope of the hill, alongside the main road leading to Fort Vaux's northern entrance. A footbridge across the moat takes them through outer doors towards the Barracks and the Ammo Depot further inside.
")
")
Flags[]
Generator Room[]
The Generator Room is found near the fort's southeastern outer walls. Two exterior breaches and reinforced with sandbag walls, but the archway entrances are otherwise open. The large square room is separated into two by a smaller, inner compartment, the walls of which are destructible. The capture zone is concentrated on the east side, near the now-outmost rupture. The darkened corners of the room near this point are filled with mounds of earthen debris, creating possible ambush positions in a room otherwise devoid of cover. The generators alongside the inner compartment continue to run noisily, possibly obscuring defenders hiding between them.
Following a trolleyway west takes players either to a stairwell leading towards the south side of Breach, or into the main loop of hallways that loop around the Central Courtyard.
")
")
")
")
")
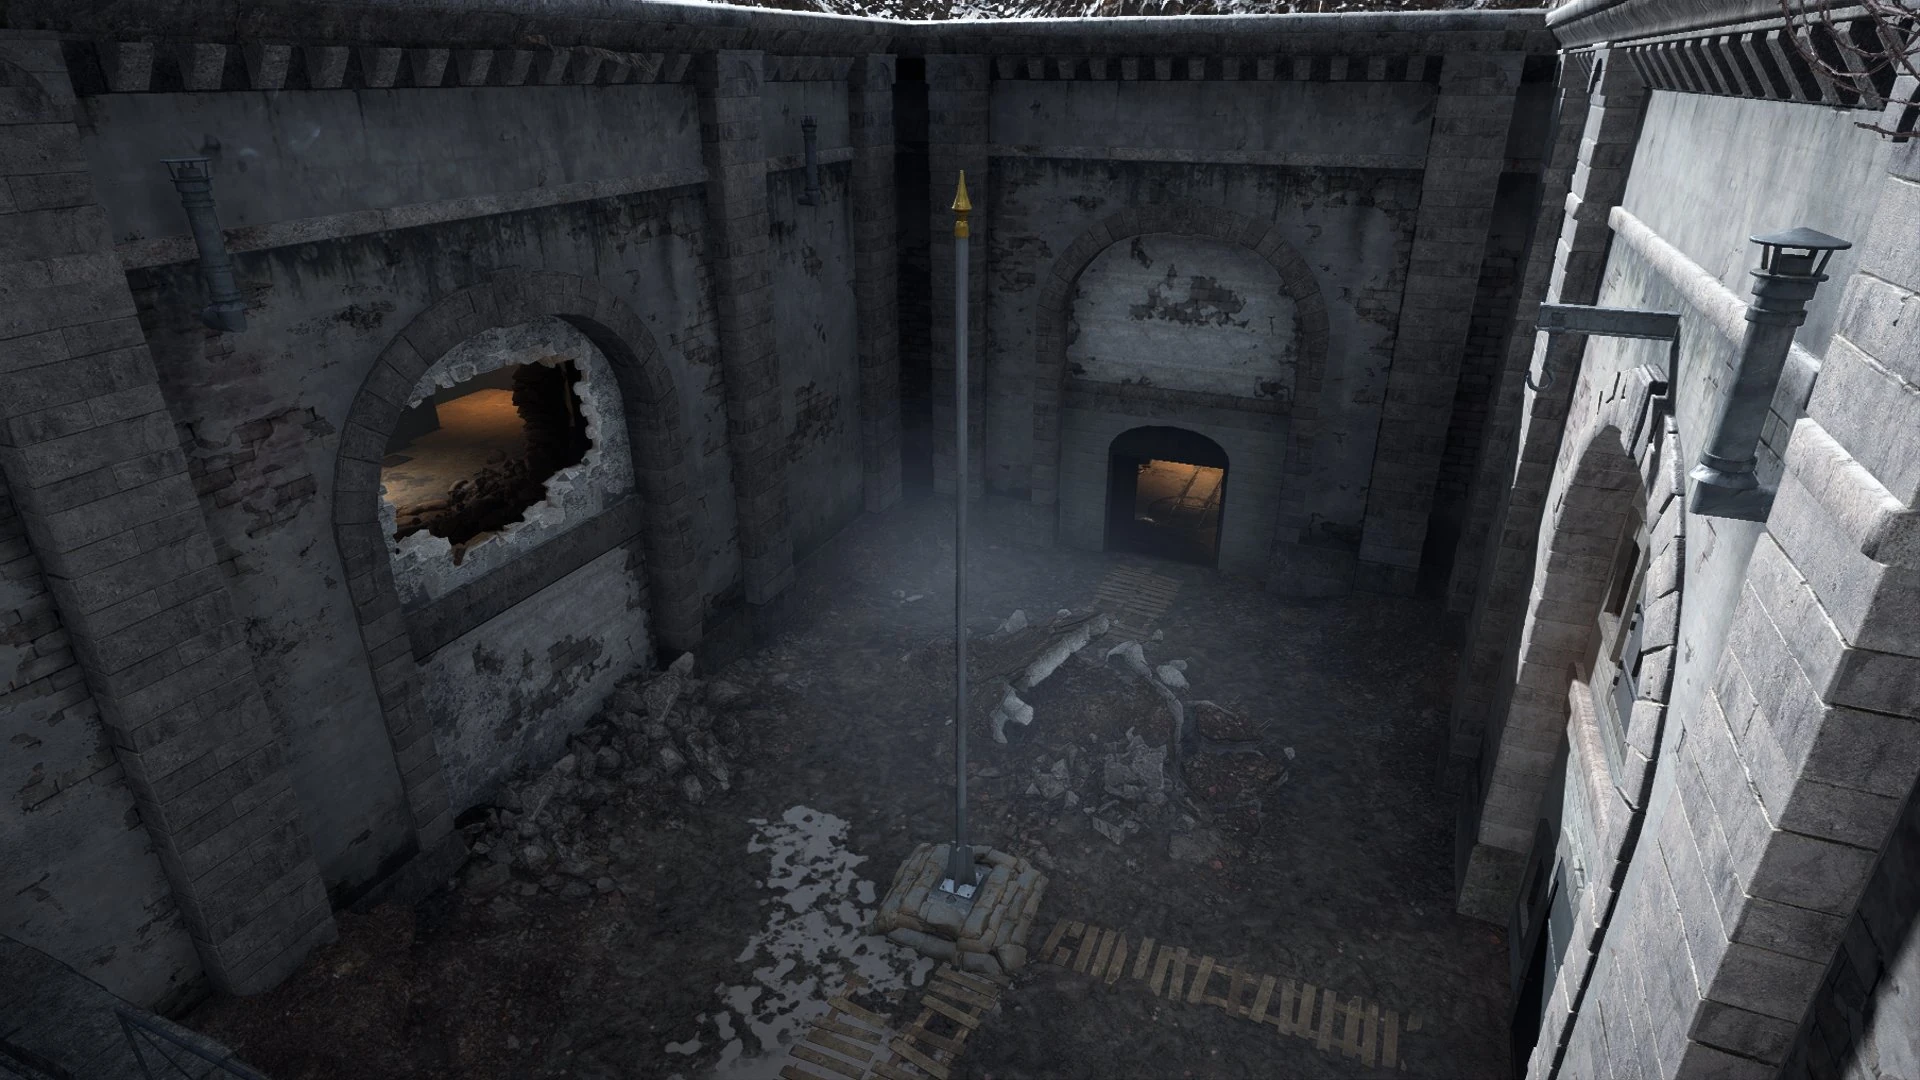
Central Courtyard[]
The so-called Cour de L'Abri, located in the direct middle of the structure, consists of an unroofed, L-shaped passageway intersected by a bridge connecting the second-story areas. Tightly connected hallways surround the courtyard and its central capture zone with many doorways opening into it and numerous windows looking over it. These arched entryways can be blown open with explosives, generating more access points to the adjoining galleries. Staircases in these hallways grant access to the second storey. The courtyard itself is fairly open, aside from the debris piles at the corners that provide ramps up to the second level.
A Sentry kit is located on the bridge platform directly adjacent to the flag itself.
")
")
")
")
")
")
Breach[]
The largest opening created by artillery is found along the northeast corner of the fort. What was once labelled as a mess hall has been rendered unrecognisable by the collapsed roof, with it and the area immediately outside now serving as a ramshackle redoubt overlooking the moat, complete with a rudimentary set of trenches dug in around the innumerable shell craters. The area is overlooked to the east by the high outer walls of the moat, the ground beyond which is accessible and may be used as an extra bypass route, or elevated position against the moat and nearby objective.
The area is visible from both deployments in Conquest, allowing for long range combat, although the capture zone itself is located more towards the interior and is thus hidden around the corner of the fort. These corners can potentially hide troops waiting to attack or bypass the breach. Indoors, two hallways lead to other areas of the fort; one connects to the Generator Room, the other passes through the kitchens on the way to Barracks.
A Flame Trooper is found near the flag itself, within the trench line.
")
")
")
")
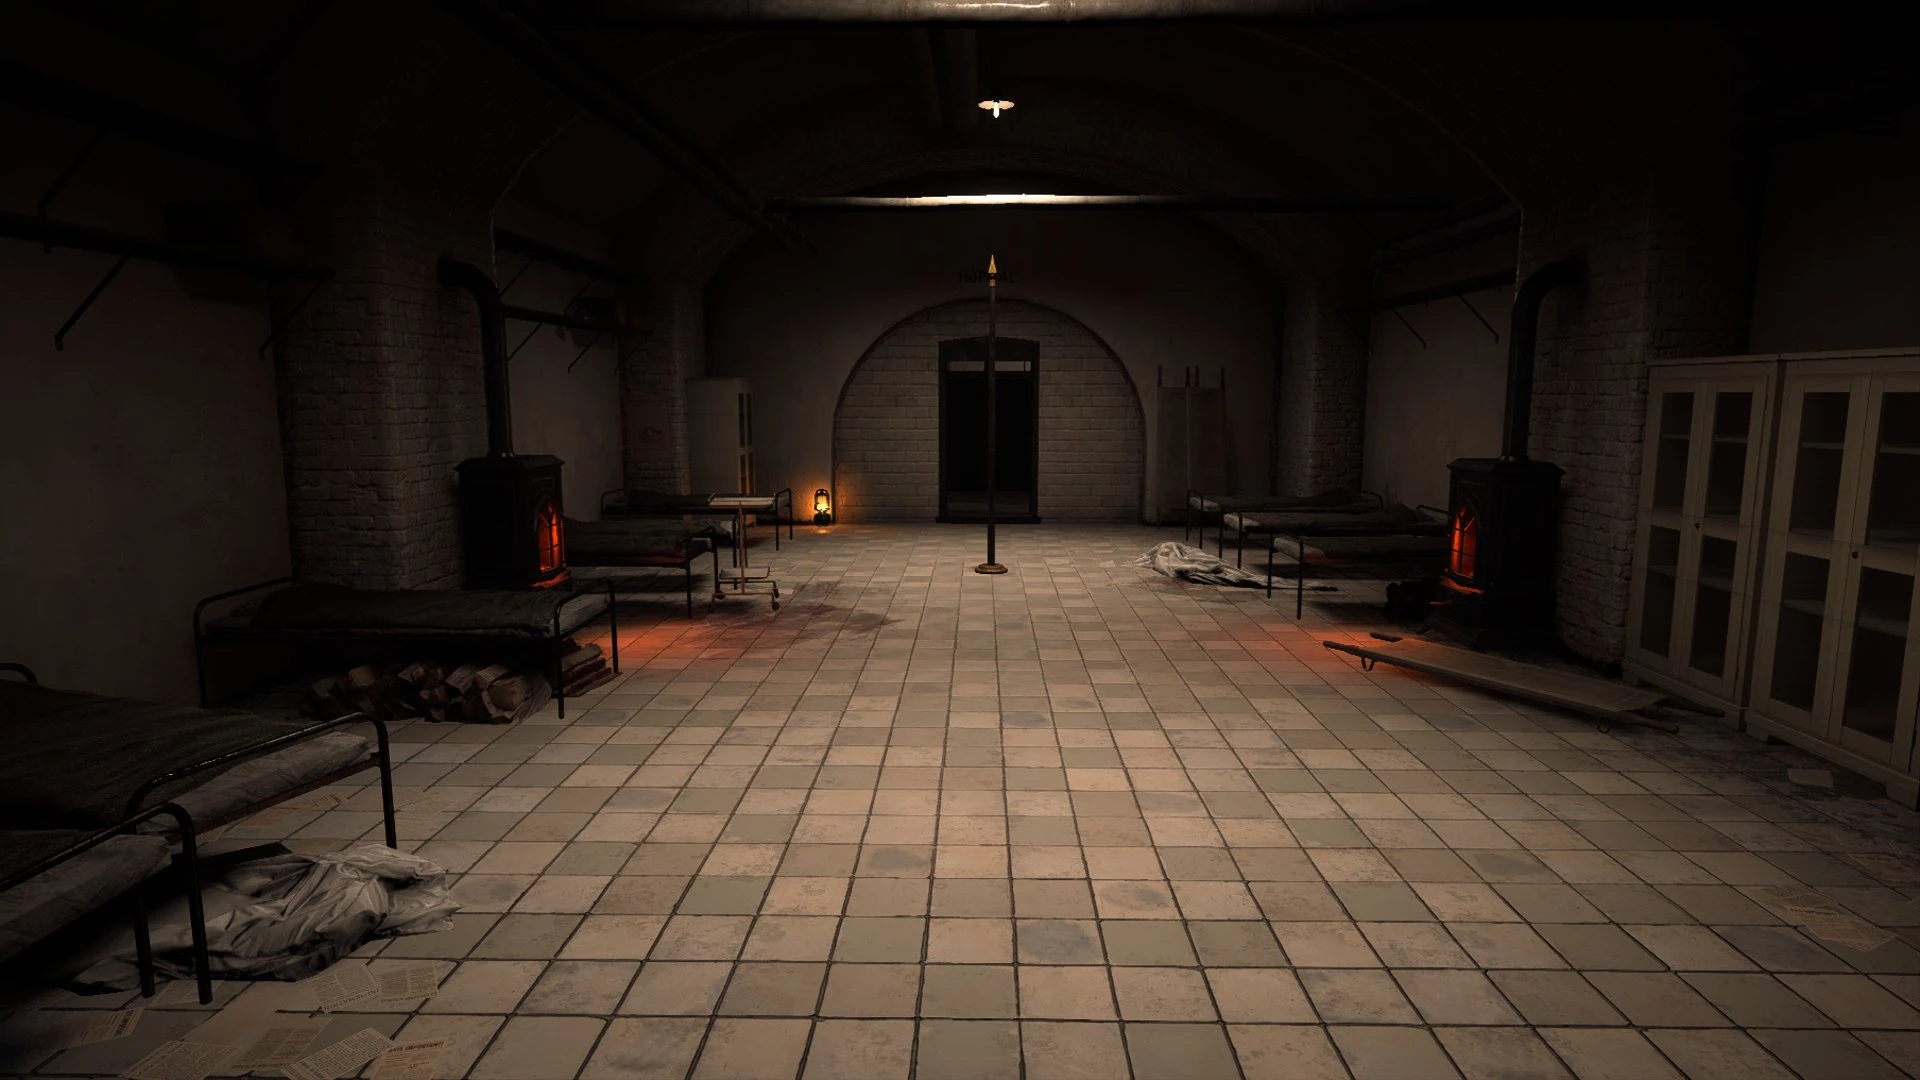
Barracks[]
A large section of the northeast side of the fort is devoted to soldier billets. The Barracks are comprised of three separate bunkrooms with doorways built into the fort's north side exterior wall. These outer walls, as well as those separating the three adjacent rooms, are partially destructible. The capture zone encompasses all three rooms, as well as including the interior corridor on the south side. Across the hall behind collapsible partitions is a small infirmary. A fortified doorway leads outside at the east end of the hallway, with alternate passages leading west and southwest towards the Ammo Depot.
")
")
")
Ammo Depot[]
The Ammo Depot, located at the lowest level, is the largest of the interior areas. Similar to the Generator Room, the great square chamber is split up by a partitioned-off inner chamber, inside of which is the flag itself. Barred cages, lining the outer walls of the main chamber, can provide hiding spots but may trap players due to their few entrances, while dangling chains can potentially reveal any intruders. Inside the inner chamber, shelves stacked high with munitions crates hinder line of sight.
")
")
")
")
Operations[]
The second Map of The Devil's Anvil Operation, the Imperial German Army approaches the fort from the southeast, with orders to clear the French Army from the fort. Unlike the first phase on Verdun Heights, the attackers are back to their usual battalion size of 250 troops.
Sector 1[]
French forces stand outside the fort, having set up a Main Defense Line and a Command Post along the south slope of the hill. Main Defense Line is outside the southern face of the fort, and is the westernmost of the two objectives. It consists of a short row of trenches that overlooks the cratered low ground from which the German's deploy. Command Post is further uphill, alongside the moat's southeast corner, and is made up of two interconnected square redoubts, overwatching the now-decimated support trenches leading north. The two objectives are separated from each other by a clearing created by a destroyed trench intersection.
Unlike the following sectors, the ground around the Main Defense Line is open and mostly exposed. The Germans advance uphill from crater to crater is made under heavy machine gun fire delivered from the fortified capture points. Once reached, close quarters fighting to clear either position is likely to ensue, with attackers usually having to defend their gains fiercely due to their close proximity to the enemy spawn, located in the nearby moat.
Sector 2[]
The Germans advance upon the fort itself, aiming for the internal objective of Central Courtyard and the outlying objective of the Breach. Breach is ostensibly the easiest of the pair to attack, as the Germans can take advantage of the exterior access routes atop the moat walls, although these somewhat exposed areas can turn into killing zones by well-prepared French defenders. Central Courtyard, accessible only through the interior corridors, can be more troublesome to reach, as the tight confines of the fort interior are by-design costly for attackers to progress through, with potential bottlenecks resulting at every corner, doorway and stairwell. The courtyard has multiple entryways, accessible from various points along the main inside loop of hallways - finding one that is less heavily defended can be the attacking team's only chance.
Sector 3[]
With the Germans now having fought their way inside the fort proper, the French are left defending the Ammo Depot and Barracks in the rearmost areas of the fort. Barracks, being located along a breachable exterior wall, can be accessed from the outside, necessitating defenders protect the approach routes along the moat. The Ammo Depot, located deep within the fort interior, is similarly difficult for attackers to reach via the constricting hallways. However, if the French are pushed off of any of the two objectives they may find it similarly difficult to counterattack, as their deployment is, at this final stage, relocated across the moat and outside the complex entirely.
Should the attackers conquer this final sector, the fort will be considered lost and the Germans can claim a tactical victory.
Frontlines[]
Frontlines combat takes place along the artillery-ruined east side of the fort, with some of the interior hallways allowing passage when conditions outdoors worsen. Central Courtyard is cut off from the play area, however its surrounding corridors become accessible when attacking the French Base.
German Base[]
German forces defend their telegraphs at the trench line. One is found near the western map border inside the trench at the Main Defense Line. The other is much further south and downhill, at the south end of the support trench. The defenders deploy very close to this objective.
")
")
Trench Line[]
A secondary trench line guarding the south-side of the fort, located just downhill from the Operation's objective of Command Post. The capture zone encompasses both the ridge trench lines and the clearing created by the destroyed intersection.
")
Generator Room[]
The Generator Room is located on the southeast side of the fort. Compared to Conquest, the capture zone is larger, extending outside the archway breach to the east into the edge of the moat.
")
Breach[]
Breach is located at the northeast corner of the fort. It is moved further away from the collapsed entryway to the set of trenches built within the inside corner of the moat.
")
French Base[]
French forces maintain telegraphs in the northern half of the fort. One is inside, located within the main corridor loop, outside the north entrance to Central Courtyard. The other is in the south side moat, astride the footbridge that spans the moat, leading to the Fort De Vaux foyer.
")
")
Rush[]
Unlike Operations, the Germans attack the fort from the north, pushing the French back towards the southern trenches.
Sector 1[]
German forces have massed in the north, looking to break in through the Barracks and Ammo Depot. So long as they can make their way indoors, and deter lookouts, artillery barrages called in by wire will not be a problem, falling harmlessly against the fortress roof.
Objective A is in the perimeter chamber on the east side of Ammo Depot, while objective B is in the hallway between the infirmary and the Barracks.
Sector 2[]
They continue their sweep through Fort De Vaux. Objective B is set under the bridge in the Central Courtyard. Objective A is in the smoke-filled main hallway outside the east wall of Central Courtyard - the telegraph is emplaced within a small, partially collapsed adjoining room.
Sector 3[]
Most of the fort is now under German control. The French continue their resistance at the Generator Room and Command Post, these open areas allowing for more effective artillery coverage. A is found near the eastern breach into the Generator Room, while B is located outside the fortress within the Command Post trenches.
Domination[]
Combat takes place in the central areas of the fort, including the northeast Breach, Courtyard, and Barracks.
Central Courtyard[]

Located in the middle of the fortress, this objective's capture zone only includes the courtyard itself, and not any of the parallel hallways.
Barracks[]

The flag for the Barracks is found in the westernmost of the three bunkrooms, with the capture zone extending partway into the connecting hallway directly South.
Breach[]

Breach is located in roughly the same area as Conquest, but with a smaller capture zone that is more focused towards the sheltered interior entrance areas to the southwest.
Team Deathmatch[]
Team Deatchmatch heavily restricts the play area to the fort interior, with only the small landing outside of Barracks and the Central Courtyard left as accessible open-air areas. Breach is cut-off east of the kitchens, as is the Generator Room.
War Pigeons[]
War Pigeons takes place around the east side of the map. Much of the fort interior and exterior are accessible, with the exception of each team's Conquest deployments and the Ammo Depot. Control of the exterior breaches and entrance points are vital due to the inability to release the pigeon inside the fort, except from within the Central Courtyard.
Gallery[]
")
")
")
")
")
")
")
")
")
")
")
")
")
")
")
")
")
")
")
")
")
")
")
")
")
")
")
")
")
")
Trivia[]
- Between the Ammo Depot and Courtyard, a room labelled "Isolement" (Isolation) is blocked off by a heavy steel door and chains. If the player stands in front of the door they will hear unnatural screams followed by a large thud on the door. Though the occupant is not revealed, the easter egg may refer to the use of isolation to treat "shell shock".[1]
- After an update 2018, signs with hidden buttons on them are now found around the map, each button corresponding to one letter in the word "Isolement". By pressing every button in order to spell out the word, the room unlocks, revealing an empty isolation room with a painting of a horse, some beds, and two interactible but unmoving valves. By throwing 5 grenades at correct moments into a hole in the corner of the room, sounds of a monster and water moving is triggered, unlocking the right valve. By repeatedly attacking specific points of a pipe in the room that make different sounds for 5 turns, the left valve is unlocked. By turning the valves in a set order (the order themselves hidden in their own code), the Battlefield series theme plays in the room, and the player unlocks "The Room" dog tag.[2]
- The map contains 5 hidden vinyls as well as a phonograph that can play them. The vinyl are scattered around the map, hidden behind some objects. Some are easily accessible, while others pose a challenge in getting them. The phonograph can be found at point D (barracks). Following the spring patch, the vinyls can now be picked up and played on the phonograph for the easter egg hunt.
- A Megalodon easter egg is hidden on this map, a reference to the Megalodon easter egg from Nansha Strike in Battlefield 4. To trigger the Megalodon, three water valves hidden on the map must first be found and interacted, causing a crater near C Point to fill up with water. After the crater is filled, a grenade must be thrown into a vertical pipe hidden underneath a pile of crates near B Point. The players must then kill three players in the water crater with melee, turning the muddy water red. Shortly after all of this is done, a Megalodon will emerge from the water when any player steps into it, killing them instantly.[3]
- In the game files this map is named MP_UnderWorld.
- Bugs can sometimes be seen running out of drain holes around the map.
- The interior of Fort De Vaux depicted in-game is far larger than the interiors of the real life Fort De Vaux, presumably to allow better gameplay.[4]
| ||||||||||||||||||||