Giants of Karelia (Russian: Гиганты Карелии) is one of the four maps included in Battlefield 4: Final Stand. It takes place in Karelia with rural villages, rivers and a secret military-research base, where prototype T-1 battlewalkers are being constructed.
Overview
Taking place during a drizzly, overcast day in Karelia in western Russia, the terrain featured on this map is of a mountainous pine forest. Dirt roads and rail lines wind across the map, forming the main routes to the objectives, which sit at varying elevations on the hillsides. A river cuts through the center of the map, and a rail bridge across it leads right into the hidden research bunker - the location of the main levolution event of the map.
Conquest
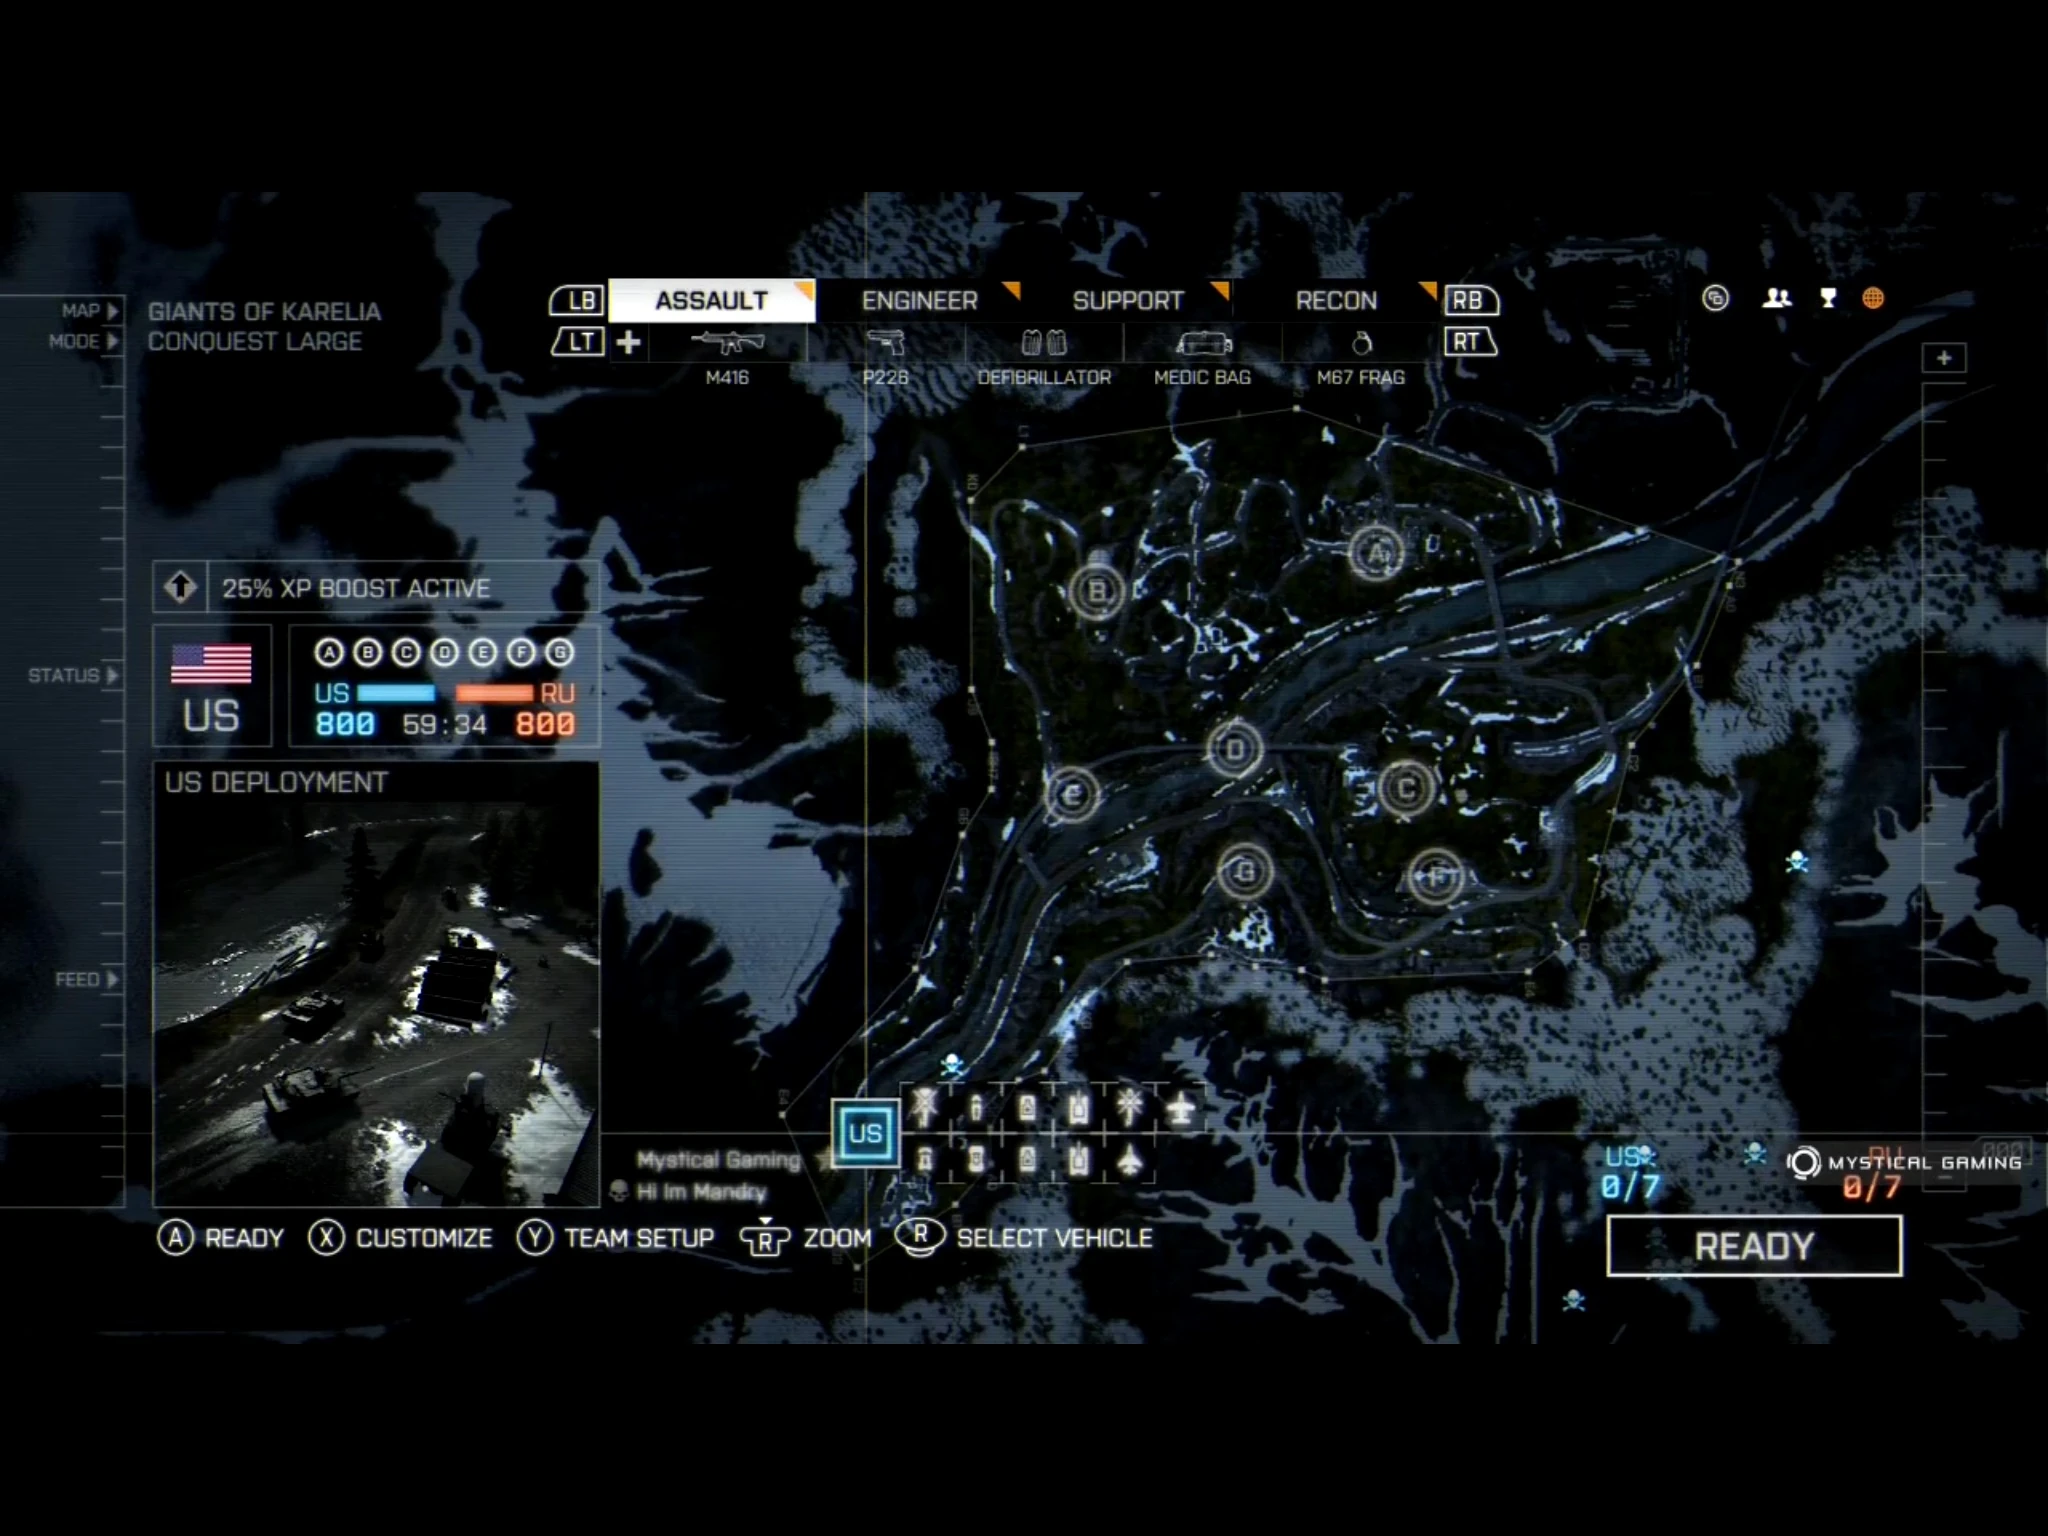
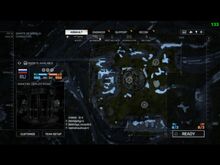
Map layout for Conquest Large
Conquest on Giants of Karelia is highly vehicle-orientated, with teams receiving a large variety of ground and air vehicles from their deployments. Conquest features four flags while Conquest Large features seven flags.
Flag Layouts
| Flag | Conquest | Conquest Large |
|---|---|---|
| Housing | A | A |
| Water Storage | B | |
| Assembly | C | C |
| Bridge | B | D |
| Supply Line | D | |
| Train Wreck | E | |
| Shipping Depot | F | |
| Cave | G |
Equipment
| Light vehicle(s) |
4 Quad Bikes |
| Infantry fighting vehicle(s) |
2 LAV-25s |
| Main battle tank(s) |
2 M1 Abrams (Conquest Large) |
| Helicopters(s) |
1 UH-1Y Venom |
| Fixed-wing aircraft |
1 F35 |
| Boat(s) |
2 PWCs (1 on Conquest Large) |
| Emplacement(s) | |
| Light vehicle(s) |
4 Quad Bikes |
| Infantry fighting vehicle(s) |
2 BTR-90s |
| Main battle tank(s) |
2 T-90As (Conquest Large) |
| Helicopters(s) |
1 Ka-60 Kasatka |
| Fixed-wing aircraft |
1 Su-50 |
| Boat(s) |
2 PWCs (1 on Conquest Large) |
| Emplacement(s) | |
Deployments
Each teams start at opposite ends of the map, on different sides of a river running roughly diagonally across the full length of the battlefield.
US Deployment
The American team begins on the south bank of the river, in a lumber yard near the southwest boundary of the map. A paved road follows the edge of the river, while a dirt path can be used to easily access the Cave (objective G in Conquest Large). However, in Conquest, the US deployment is moved further up the river to the approximate area of the gas station across from the Train Wreck (objective E in Conquest Large).
RU Deployment
The Russians are deployed from a farm in the northeast corner of the map, with their vehicles parked on roads surrounded by tilled farmland. The two roads leading southwest out of the camp meet at an intersection just north of Housing (objective A in Conquest Large). However, despite the RU deployment being generally far from the river to the south, their PWCs underneath a rail bridge spanning the river on the very edge of the map. With regards to their deployment in Conquest, however, it is located slightly south of where the Russian troops spawn in Conquest Large.
Bases
Housing
Commander Resource: Infantry Scan (Conquest)
Objective A, being placed north of the river and close to the same longitude of objectives C and F (Assembly and Shipping Depot in Conquest Large), Housing is the closest flag to the Russian deployment. The objective takes the form of a residential hamlet, comprised of a number of small stone bungalows, as well as a radio antenna standing in the northwest corner of the village. The streets are lined with wooden fences and scattered piles of logs, and a number are partially blocked by parked military trucks. While the many buildings and fences provide plentiful hiding places on this flag, almost every structure and object in the area can be destroyed. In addition, due to the village being located on flat ground with few trees, the flag is vulnerable to attacks from the air. Two roads lead out of the village - one to the east connects to a bridge spanning the river, while the other in the west winds through foothills towards the water treatment plant (objective B in Conquest Large). When captured, depending on which faction, either an LAV-25 or a BTR-90 will spawn, as well as 2 Quad Bikes.
Water Storage
Commander Resource: Cruise Missile (Conquest Large)
The water treatment facility is found in the western area north of the river dividing the map. Its most notable physical feature is the large orange water tank, situated next to a small house opposite a junction. The area is also home to several smaller gas containers, in which the contents can be ignited with explosives. The surrounding area is a maze of narrow dirt tracks and steep hills, making the flag somewhat difficult to reach on foot. Despite scattered metal structures and shrubbery, cover here is either sparse or, in the case of the gas canisters, undesirable. Two Quad Bikes spawn here, as well as a stationary 9M133 Kornet Launcher, sitting directly adjacent to the flag itself.
Assembly
Commander Resource: Cruise Missile (Conquest)
Objective Charlie takes place in the main circular assembly room of an underground testing complex. Although the capture zone in limited only to this main room, the base is deceptively expansive, with many distinct sectors and multiple entryways. With the bunker interior being too cramped for most vehicles, combat around this flag is limited to close-quarters infantry combat. The main capture zone is littered with incomplete walker prototypes, sparking electrical equipment, and engineering equipment and materials - the plentiful cover and relative darkness in this area can be utilized to great effect by infantry. There are several entrances into the base. On the west side of the main bunker, a small compound connected to the railway bridge yields two large archways into the main room. Also, there is another smaller entryway to the south with seal-able blast doors, linked to a service corridor ultimately leading to the workshops on the south side of the complex. Two corridors along the southern wall of the workshop, also with blast door protection, lead to the Shipping Depot (objective F in Conquest Large). Following another corridor east from the workshop, up a set of stairs running alongside a funicular railway, opens out into a parking lot with an SC-42 stationary weapon. In a tunnel east of the main room, a ladder to the surface sits at the end of a dank cave. Finally, a railway line on the northern side of the base has exits across the rail bridge to the west and supply line to the east, with both of these tunnel exits having operable doors. When captured in Conquest Large, it spawns either a T-90A and an Mil Mi-28 Havoc on the rooftop helipad or an M1 Abrams and an AH-1Z Viper on the helipad.
Bridge
Commander Resource: Vehicle Scan (Conquest Large)
The central flag of the map, objective D is found in the middle of the primary rail bridge crossing the river. Having a fairly large capture zone, the flag can be seized from ground level on either side of the river. However, since the Bridge is sitting in a valley, the flag is exposed to fire from elevated positions on all sides, and, with the exceptions of a few metal structures and boulders in the immediate area, the objective has few positions of shelter. The actual deck of the bridge is able to be reached through several ladders running up the support columns. Not only that, but the deck also provides a direct route to objective Echo (Train Wreck) to the west and objective Charlie (Assembly) to the east. Due to the water being shallow around this particular objective, this area is suitable for infantry and vehicles to ford the river. When the objective is successfully captured it yields two Quad Bikes, and depending on which faction, will also yield either an LAV-AD or a 9K22 Tunguska.
Supply Line
A base unique to standard Conquest, the Supply Line is positioned near a railway line running under a bridge on the eastern edge of the map. A stationary cargo train is located here, with operable carriage doors. Due to the steep terrain here and the plentiful cover for infantry forces, capture of the flag by ground vehicles is unsuitable. From this objective, a road runs northwest towards the river, while the railroad can be followed into the bunker complex and the manufacturing station. When captured, two Quad Bikes spawn.
Train Wreck
Commander Resource: Infantry Scan (Conquest Large)
Objective Echo is situated on the banks of the northern side of the river, making it only a short distance northeast of the US spawn. The flag itself is found around a derailed train (hence the objective's name) along with wire fences and scattered railway cars with operable carriage doors. To the north is an elevated railway bridge, which can be used to gain an elevated overwatch position against the objective, while an abandoned gas station is found across the river to the south, which is also where the USMC spawns in a game of Conquest. After capture, two Quad Bikes spawn near the flag on the north side of the river. In addition to the light vehicles yielded by the Train Wreck's capture, an SC-42 emplacement found across the river on the forecourt of the petrol station.
Supply Depot
Placed very close to the Assembly facility (objective C in Conquest Large), objective F is found in a small paved compound outside of the processing facility. A number of military trucks and corrugated iron cabins stand within the depot, which is surrounded by a wire fence. The trucks and scattered military-grade equipment serve as adequate cover for firefights due to their durability. Directly south of the flag is a steep drop with a bridge crossing over it, while to the north are two tunnels leading to both the interior of the workshops within the research bunker and Assembly. Only a single Quad Bike spawns as a result of being taken over.
Cave
The Cave is located uphill from the US spawn, and is directly to the south of the Bridge (objective D in Conquest Large). The main feature of this flag is a cramped, T-shaped cave system carved out of the rock face adjacent to the road up the mountain. The capture zone extends to the majority of this interior area, limiting the effectiveness of vehicle support for this flag. The caves, although small and well-lit, do provide some opportunities for ambush against attacking infantry. When captured, depending on which faction, either an LAV-25 or a BTR-90 will spawn, as well as 2 Quad Bikes.
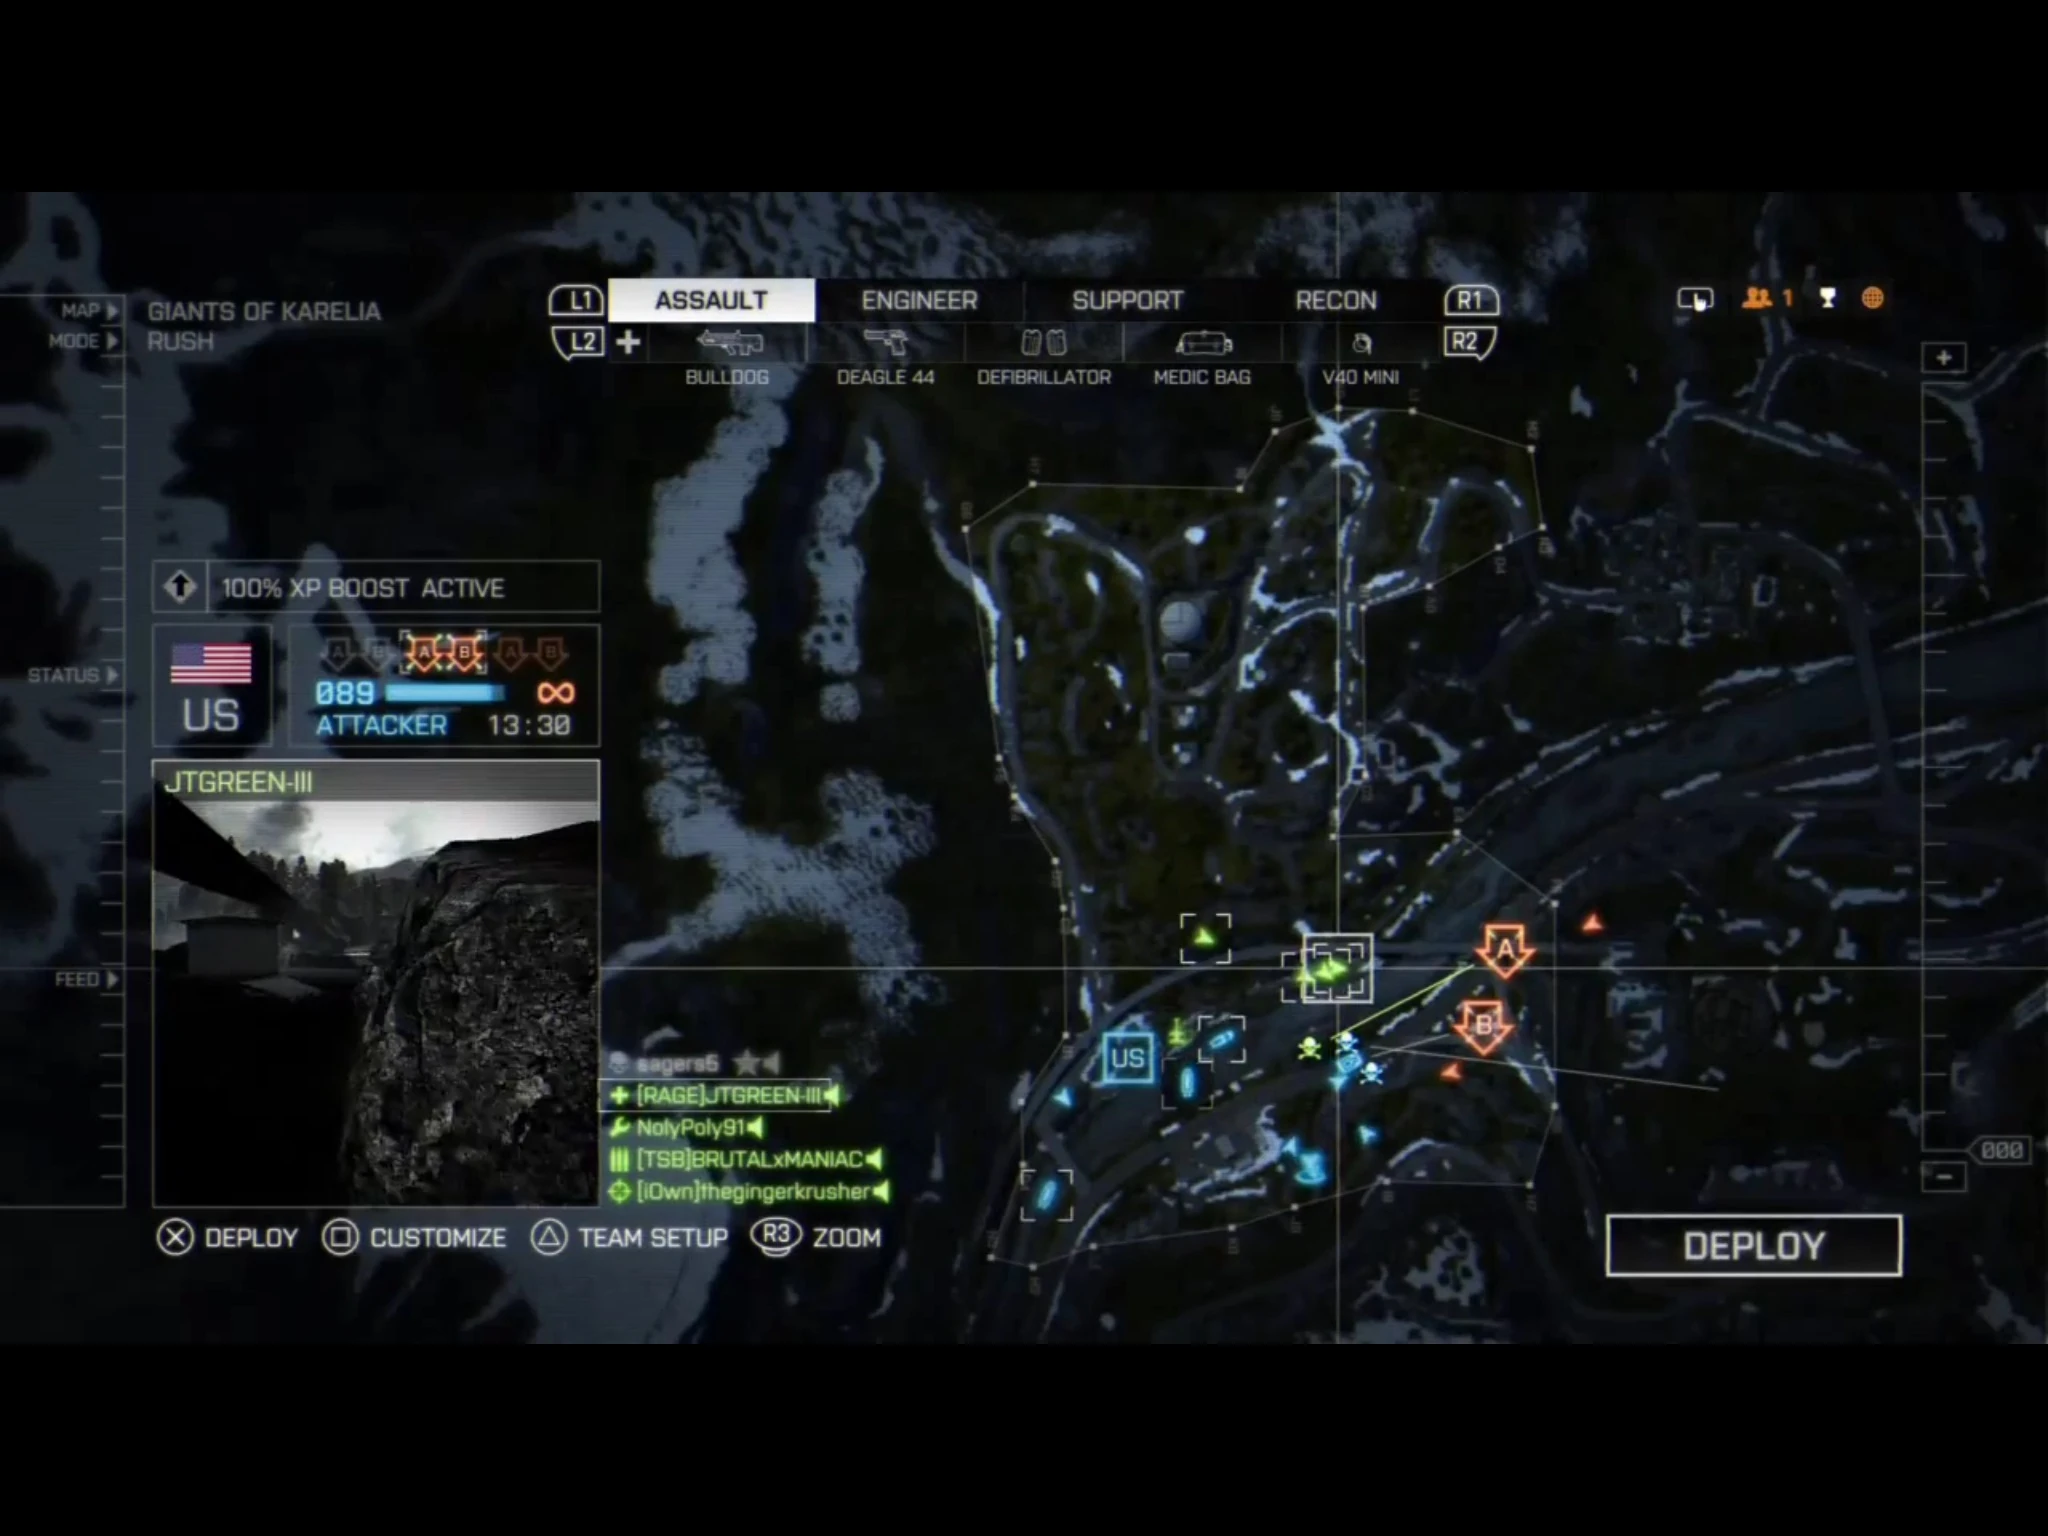
Rush
In this map there are four stages, with the USMC assaulting the RGF's defensive positions. However, during the entirety of the gamemode, the defenders are not given any vehicles to counter the assault.
Stage 1

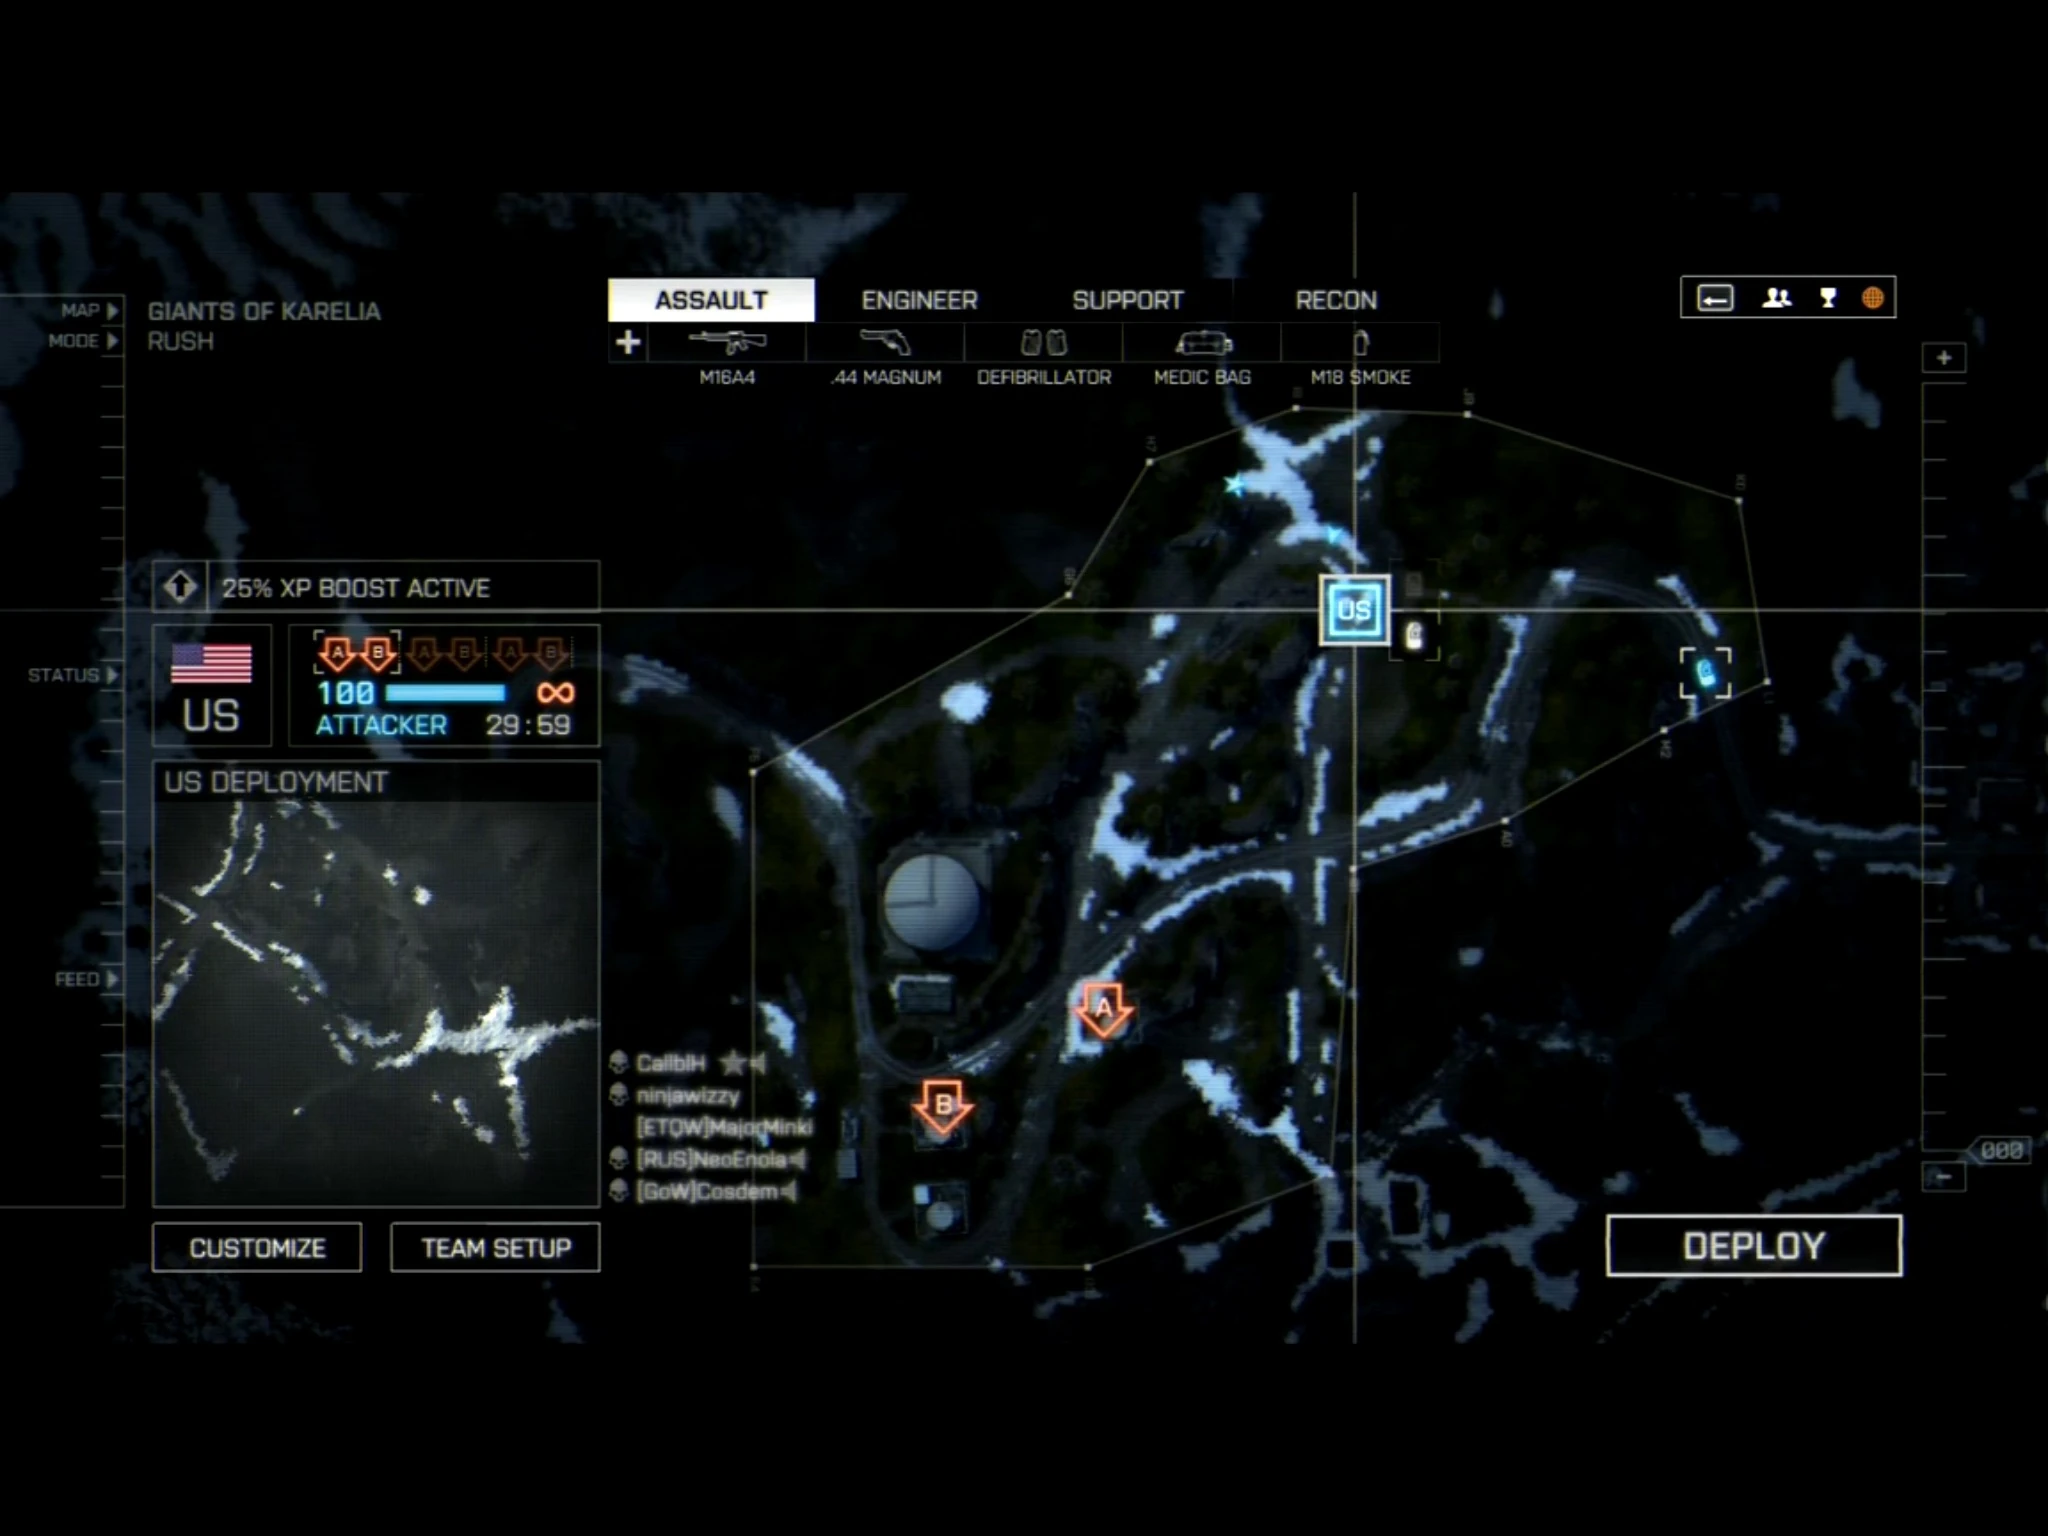
Stage 1
In the first stage, the attackers advance southwest to reach the first set of MCOMs. As they attack, the USMC engages the RGF in the area surrounding the water storage (objective B in Conquest Large). The first objective is located next to a large orange gas container surrounded by a wire fence, and the second is found in a similar location further down the road to the southwest.
The USMC deploys approximately several hundred meters northwest of the water treatment plant. One of the best strategies to reach and destroy the MCOMs would be to quickly flank from the left side before the defenders gain ground. If the defenders do so, they have a better vantage point and a better chance at defending the first set. The USMC is given both an LAV-25 and an AAV-7A1 AMTRAC armored personnel carrier to begin with.
The RGF spawns south of MCOM Bravo, thus giving them easy access to their objectives. In order to successfully defend the objectives, it is best to establish a defensive line on the high ground, and because of this, defending objective Bravo is relatively easy. If the high ground is taken, support and recon players can suppress the objectives and prevent enemies from reaching and arming them.
Stage 2
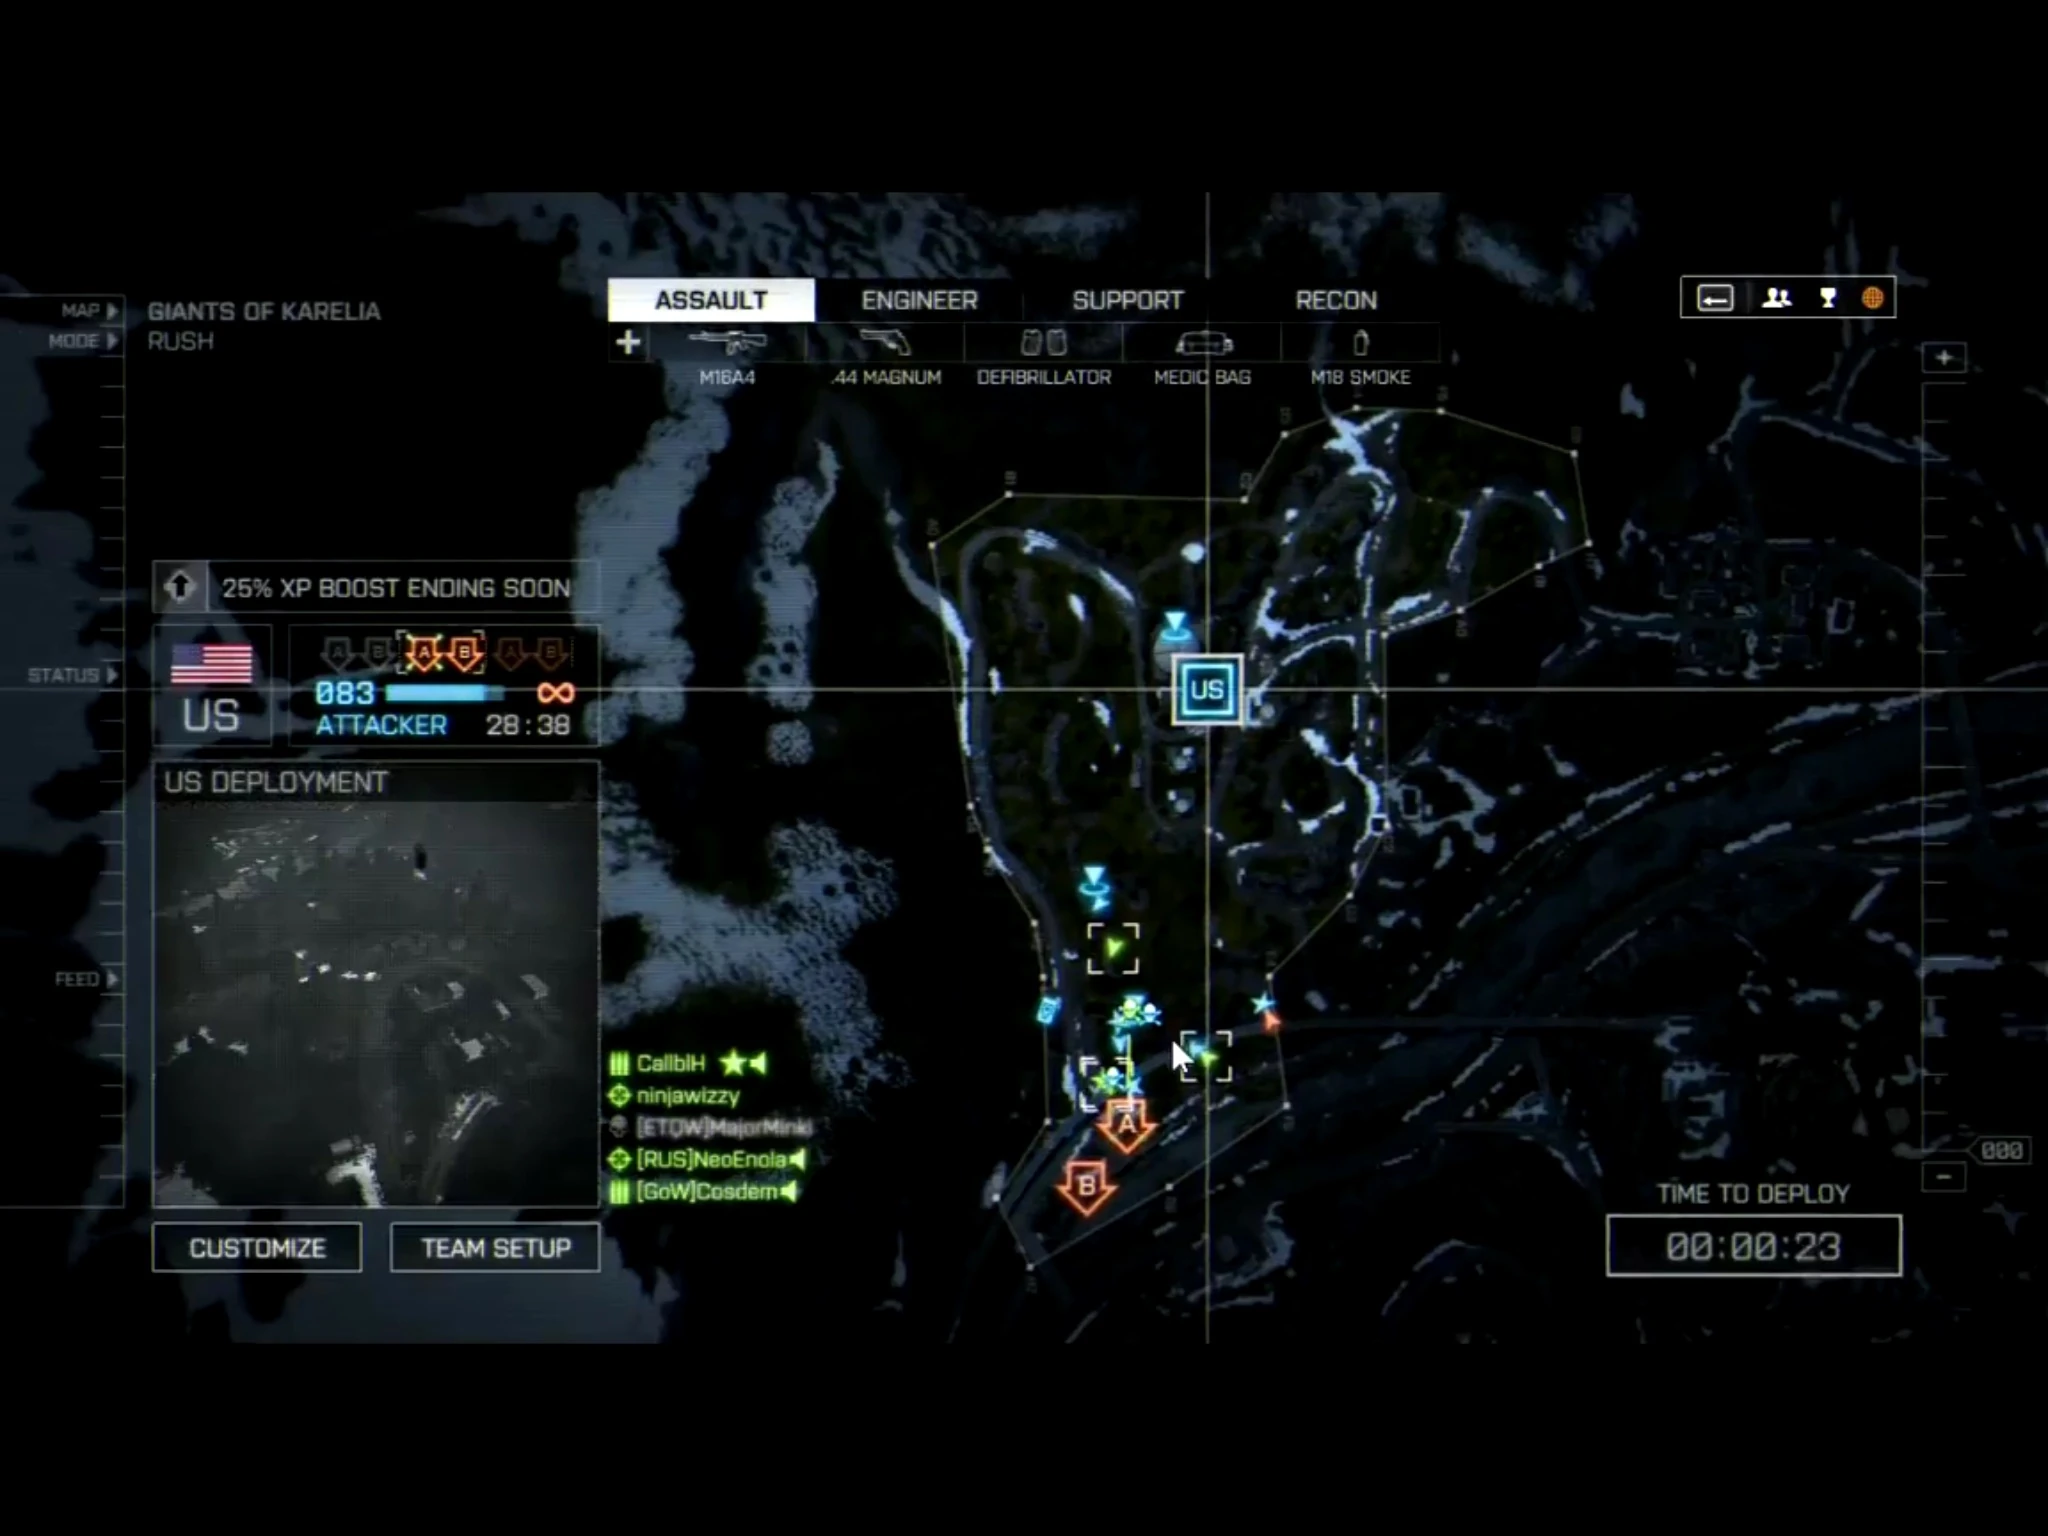
Stage 2
Stage 2 is found where the wreckage of the cargo train lies (objective E on Conquest Large) to the south of the water storage plant. Both MCOMs are found on the unloading platform, with one located next to a stationary lorry on the east side, and another further north next to a train carriage. Stationary cover is frequent throughout the area in the form of scattered train cars and debris.
Regarding the second set, after destroying the first 2 MCOMs the attackers spawn where the previous set of MCOMs were. Because of this, the USMC is given the high ground above Stage 2. In order for the attackers to use this to their advantage, one of the best strategies to employ would be to rush quickly down the hill and use the height to their advantage. This doesn't give the defenders enough time to establish a perimeter, making it easy to take the second set. The USMC keeps their LAV-25 and is given a single Quad Bike, but they lose their AAV-7A1 AMTRAC.
After losing the first set, the RGF falls back to defend their second set around the derailed train. After being pushed back, their deployment lies across the river at the abandoned gas station, leaving them to have to cross a bridge to get to the objectives. Because of the frequent cover of the train wreck, the RGF can be relatively sheltered from enemy fire while defending.
Stage 3
Stage 3
The objectives for Stage 3 are located on the southern side of the river, near the central rail bridge (objective D on Conquest Large). MCOM Alpha is at the base of a bridge support column near the riverbank, and MCOM Bravo is next to a series of corrugated iron sheds at an intersection with halted military vehicles which can serve as stationary protection.
After the second set has been taken, the USMC moves up to deploy on the northern side of the river, directly opposite of the abandoned gas station on the south side. There are several ways to reach the objectives; if the IFV still hasn't been destroyed, one tactic can be to drive across the central rail bridge that leads to above objective Alpha. Another path can be through using the new vehicles to drive up the river and attempt an amphibious assault. Lastly, one could try to cross to the southern side of the river and advance through the forest, reaching the high ground above the objectives. Keep in mind when attacking, laying back and being passive doesn't help the team at all, and since the objectives are in relatively open ground, tickets can drain very quickly if not mindful. The USMC loses access to all of their land vehicles and are given both a RHIB and PWC for the third set.
The RGF, being pushed back after losing the second set of objectives, deploys outside of the entrance to the assembly complex, east of their assigned objectives. However, during this stage, the defenders must be wary of attackers coming from the central rail bridge, the river, or to the southwest, because of the various routes the attackers are given access to.
Stage 4

Stage 4
The last stage is centered around the walker facility that the rail line leads to. An MCOM is along the far east wall of the main circular room. The other MCOM is in a laboratory full of work stations and glass panels, through a corridor south of the main bunker. There are several entrances into the base. On the west side of the main bunker, a small compound connected to the railway bridge yields two large archways into the main room. Also, there is another smaller entryway to the south with seal-able blast doors, linked to a service corridor ultimately leading to the workshops on the south side of the complex. In a tunnel east of the main room, a ladder to the surface sits at the end of a dank cave. Finally, a railway line on the northern side of the base has exits across the rail bridge to the west and supply line to the east, with both of these tunnel exits having operable doors.
The attackers move up to deploy to where the former MCOMs were (underneath the central rail bridge). In order to reach the final set, the USMC must advance east to enter the compound. However, as listed above, there are multiple entrances to the complex which can offer a variety of attacking methods. For the USMC to be successful in the final assault, the entire team must make a synchronized push into the complex. If they fail to do so, or if people hold back, the defenders would be able to stay inside the sheltered compound and keep the attackers from breaching their lines. For the final assault, no vehicles are issued to the USMC.
The RGF is forced to retreat to defend their final set of MCOMs around the assembly compound (objective C in Conquest Large). Likewise, their deployment is pushed all the way back to the area east of the where their objectives are. Considering that both objectives are in an area where cover is frequent, there are numerous positions to set up flanking and ambush positions.
Team Deathmatch

Map layout for Squad and Team Deathmatch
The Team Deathmatch gamemode is present in the assembly complex of the interior bunker system. When comparing the actual play area in the smaller gamemodes than to Conquest Large, it remains practically identical, with debris, machines, and various other objects strewn about. This is also present in the Squad Deathmatch and Domination gamemodes.
Squad Deathmatch
The Squad Deathmatch gamemode is present in the assembly complex of the interior bunker system. When comparing the actual play area in the smaller gamemodes than to Conquest Large, it remains practically identical, with debris, machines, and various other objects strewn about. This is also present in the Team Deathmatch and Domination gamemodes.
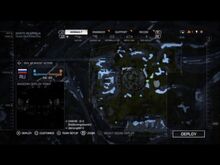
Obliteration

Map layout for Obliteration
Equipment
| Light vehicle(s) | |
| Infantry fighting vehicle(s) |
1 LAV-25 |
| Main battle tank(s) | |
| Helicopters(s) | |
| Boat(s) |
1 PWC |
| Emplacement(s) | |
| Light vehicle(s) | |
| Infantry fighting vehicle(s) |
1 BTR-90 |
| Main battle tank(s) |
1 T-90A |
| Helicopters(s) | |
| Boat(s) |
1 PWC |
| Emplacement(s) | |
Obliteration takes places across the full length of the map, with the USMC and RGF spawning where they do in standard Conquest. Each team's objectives are found on opposite sides of the river, with the USMC's MCOMs concentrated around the assembly facility on the south side (objective C in Conquest), and the Russian's being in the vicinity of the water distillation plant to the north (objective B in Conquest Large).
A number of quad bikes are scattered about the map, helping transport across the difficult and expansive terrain of the map. In addition, an XD-1 Accipiter battle pickup can be found near each team's respective B objective.
Capture the Flag

Map layout for Capture the Flag
Equipment
| Light vehicle(s) |
2 Quad Bikes |
| Infantry fighting vehicle(s) |
1 LAV-25 |
| Emplacement(s) | |
| Light vehicle(s) |
2 Quad Bikes |
| Infantry fighting vehicle(s) |
1 BTR-90 |
| Emplacement(s) | |
Capture the flag is concentrated around the eastern section of the map, cutting off everything west of the railway bridge as well as the Conquest deployments. As with Obliteration, the opposing sides defend positions on different sides of the river - the USMC's flag is outside the bunker complex on the south side (objective F in Conquest Large), while the Russian objective is in the village on the north side (objective A in Conquest).
Domination
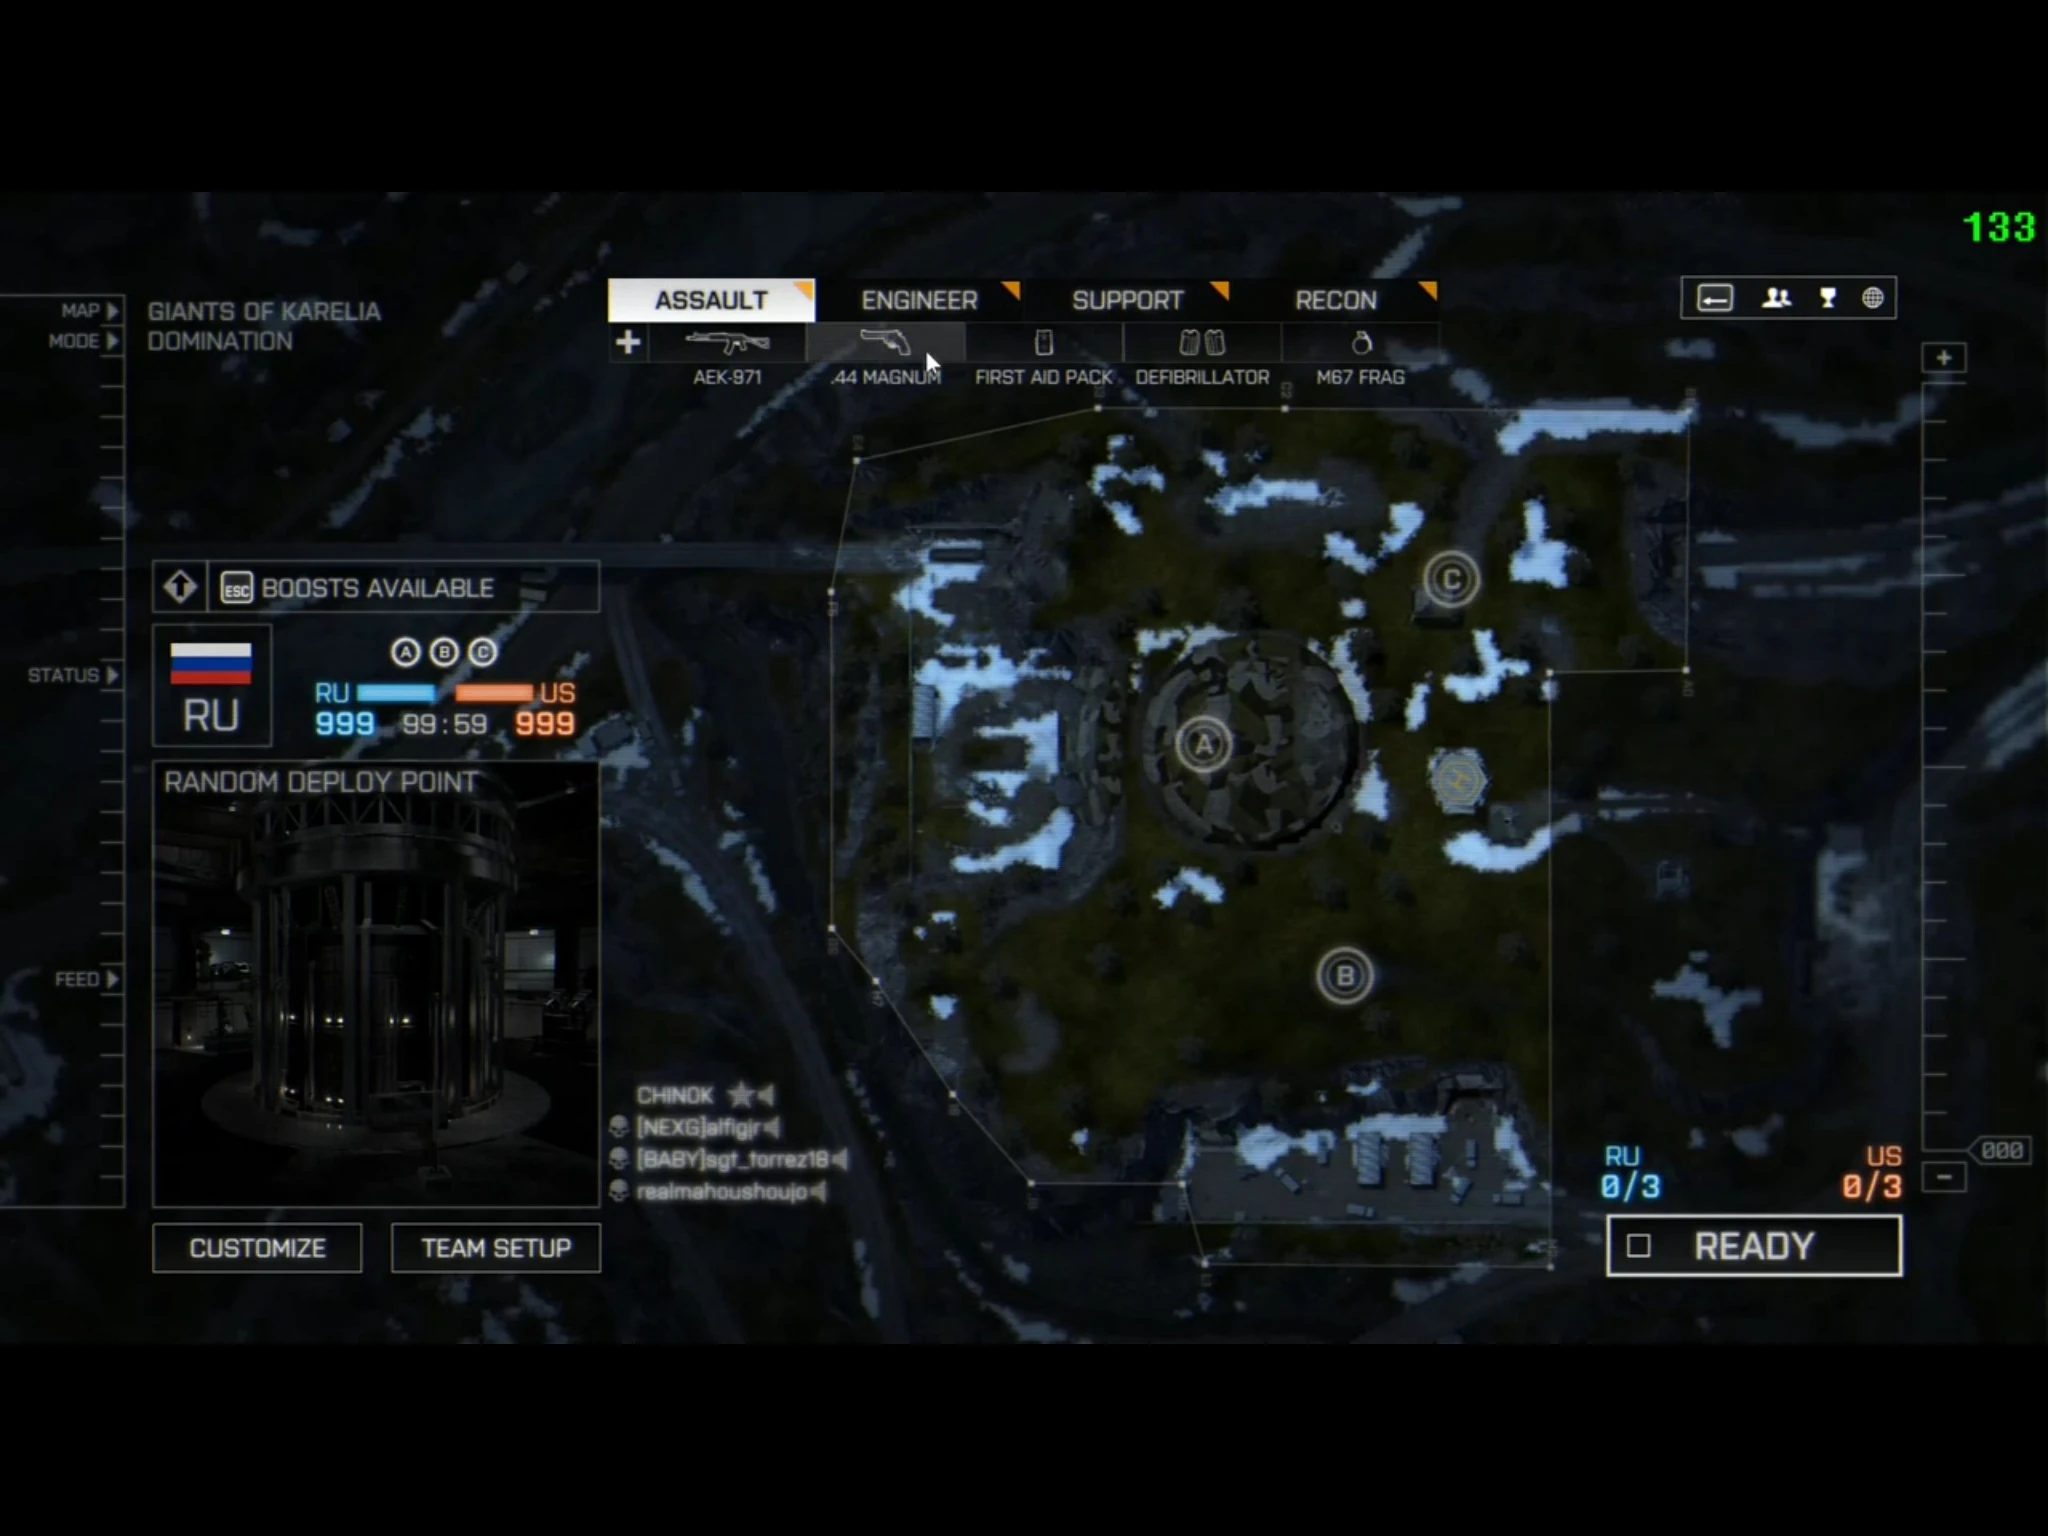
Map layout for Domination
The Domination gamemode is present in the assembly complex of the interior bunker system. When comparing the actual play area in the smaller gamemodes than to Conquest Large, it remains practically identical, with debris, machines, and various other objects strewn about. This is also present in the Squad and Team Deathmatch gamemodes.
A: Assembly
Objective Alpha in found in the main cylindrical room, with the capture zone being directly opposite the two western entrances of the bunker. The raised catwalks lining the perimeter can provide a useful height advantage against enemies in this room, although cover around the capture point is generous. An M32 MGL battle pickup can be found in a room with firing ports overlooking the western exterior compound.
B: Workshop
Objective Bravo is located on the southern side of the complex, inside a testing facility. A series of waist-high cubicles, engineering equipment, and metal support columns encompass the majority of cover here, with the flag itself, found at the east end of the workshop, lying at an intersection of two corridors. A USAS-12 battle pickup is found in said corridor, in front of a metal grate directly north-east of the flag.
C: Platform
Objective Charlie is found on the northern side of the base, in the rail tunnel passing east to west. The train cars, supply crates, as well as the gap between the train line and the platform, provides plentiful cover around this particularly dark and confined objective. Although the general area is not entirely darkened, the use of FLIR and IRNV optics are highly useful.
Defuse
Defuse takes place around roughly the same area as Domination as well as Team and Squad Deathmatch, with the US team attacking the Russian objectives inside the base. The Marines spawn with the bomb in the river southwest of the bunker. The Russians spawn in the cave with the ladder to the surface on the far east side.
Objective Alpha is located inside the main cylindrical room, just inside the western entrance, while objective Bravo is found in the workshop on the south side of the base.
Levolution
The primary levolution event of Giants of Karelia takes place in the large circular room of the Assembly station (objective C in Conquest Large). Inside the large room, a destructible dome resides above it, which can be demolished with explosives, sending a torrent of potentially deadly debris crashing down into the main room, littering the area with rubble and opening up another entrance to the base from above. This collapse adds even more cover to the area. In addition to this, the bunker has many operable blast doors, which can be open or closed by control panels nearby. Finally, both the scattered train cars at the Train Wreck (objective E in Conquest Large) and the parked railroad carriages present at the Supply Line (objective D in Conquest) have doors that can be opened and closed.
Trivia
Early Pan-Asian Coalition emblem present at the facility.
- Like many of the Final Stand maps, an early version of the Pan-Asian Coalition emblem can be seen throughout this map, hinting at a link between the War of 2020 and the the Cold War.
- This is the only map to not be set during winter time in Final Stand and thus the only map not to be entirely covered by snow.
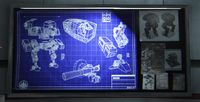
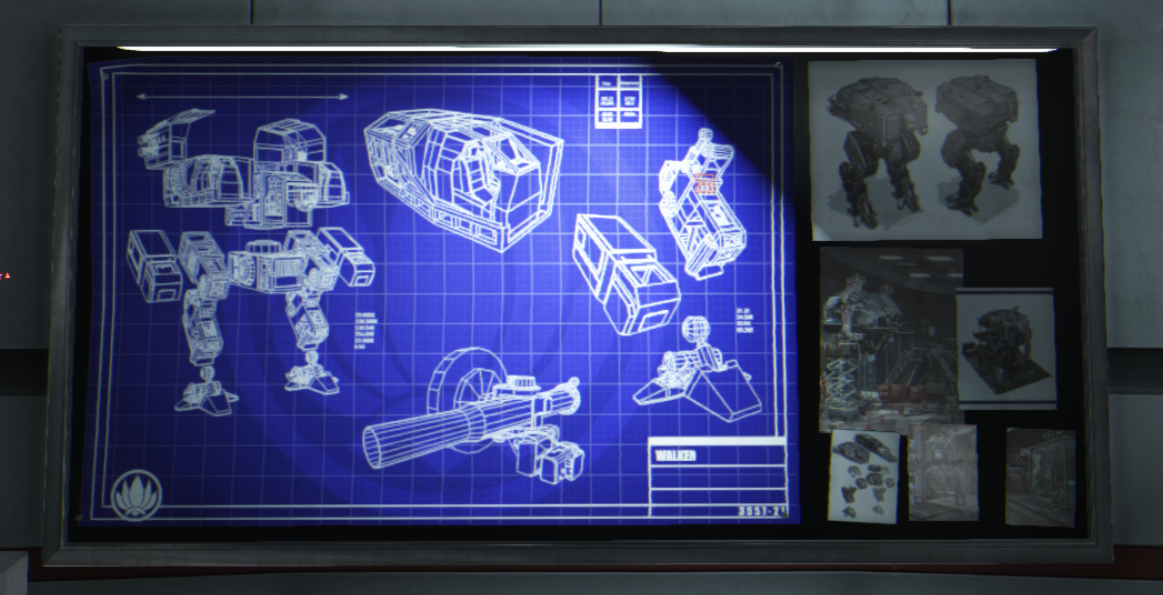
Walker blueprints.
- The name of the map, Giants of Karelia, refers to the "giant" prototype robots being built inside the secret military-research base.
- Blueprints and concept art show what appears to be a prototype version of the T-39 Bogatyr from Battlefield 2142.
- The bunkers and concrete walls protecting them have a pattern similar to the Swedish standard M90 splinter-camouflage pattern.
- The two smaller "water" tanks at the "Water Tank" flag in Conquest Large actually will explode when shot at, as if they were filled with an flammable substance.
- The caves to the south-west of the map (flag G in conquest large) do not appear in the PS3/Xbox 360 versions of the game; the entrances are covered by rocks.
- This map's name in files is XP4_WlkrFtry (short for Walker Factory).
| ||||||||||||||||||||||||||