The Battle of Iwo Jima was a battle in the Pacific Theater of World War II in 1945, fought between the United States and the Empire of Japan. It was an American amphibious and aerial assault on the Japanese controlled island of Iwo Jima of a combined force of United States Navy, Marine Corps and Air Force divisions against a large garrison of Imperial Japanese Army forces. The battle ended in an American victory, with almost the entirety of Japanese forces having been killed, though Marine forces suffered even more casualties. The battle is featured in Battlefield 1942 and Battlefield 1943.
Battlefield 1942
— Map Briefing
On Iwo Jima, the Amerians start with no bases, but spawn points on the USS Enterprise aircraft carrier, and a battleship. The axis control 4 of the 5 control points on the island, the airfield, Mount Suribachi and 2 bunker posts in between. The landing beach starts uncaptured, but can only be captured by the allies. Once captured, this becomes a permanent base.
Equipment
| Light vehicle(s) | |
| Medium tank(s) | |
| Fixed-wing aircraft | |
| Emplacement(s) | |
| Light vehicle(s) | |
| Medium tank(s) | |
| Fixed-wing aircraft | |
| Boat(s) | |
| Ship(s) | |
| Emplacement(s) | |
| Neutral | |
| Emplacement(s) | |
Bases
Allied Fleet
Consisting of an aircraft carrier (USS Enterprise) and battleship (HMS Prince of Wales) the fleet is the only initial spawn point for American forces. Both spawn LCVPs, while the carrier also spawns an F4U Corsair and an SBD Dauntless and is home to 40mm Bofors anti-aircraft guns. The battleship has artillery capability. Both ships are also movable with the player at the helm.
")
")
Landing Beach
This can only be captured by the US forces and, once captured, becomes a permanent base. The Beach is covered by machine guns and bunkers on top of the cliffs, and has only one exit road. It spawns two Sherman tanks.
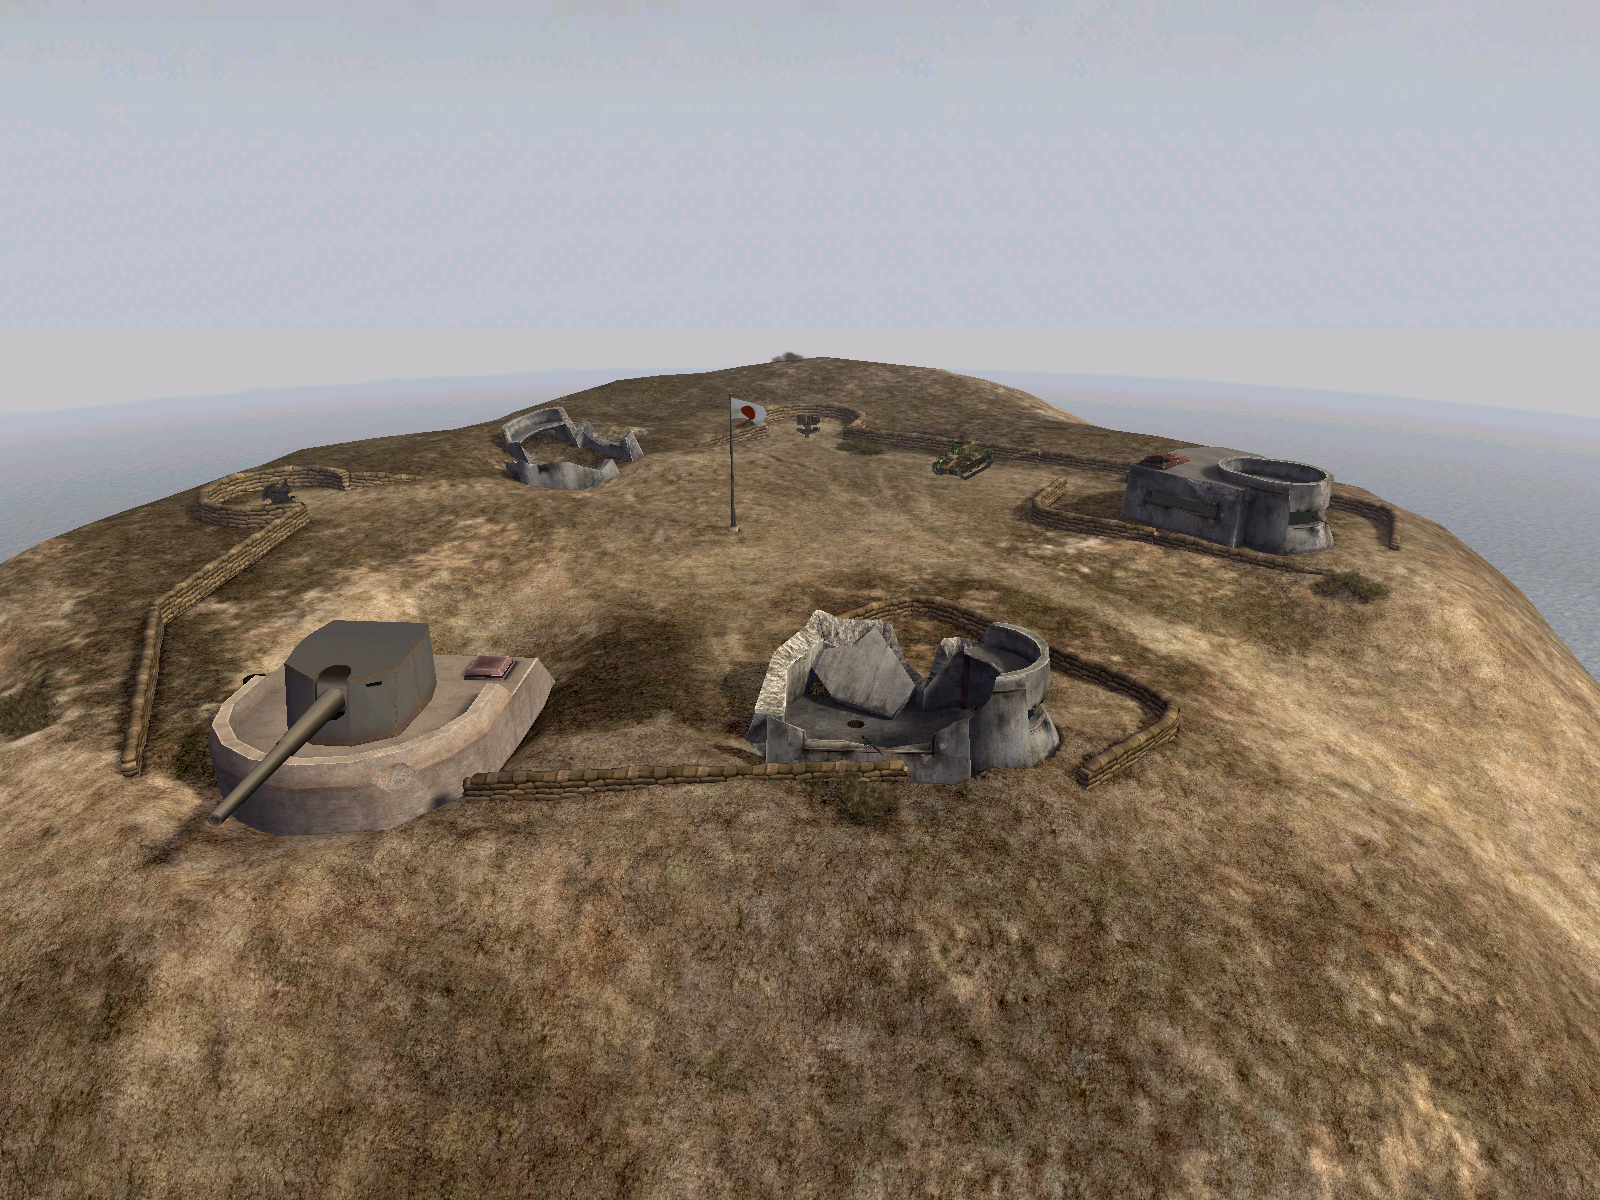
Mount Suribachi
An overview of Mount Suribachi under Japanese control, looking North-East
A large mountain overlooking the island, this initially-Japanese base has a bunker at the top and spawns a tank, either a Sherman or Type 97 Chi-Ha, depending on who controls it. The steep road up to the base is covered by 4 MG42/M2 Browning emplacements also for the same reason. A coastal Defgun is also located here.
")
")
Bunkers
There are 2 initially-Japanese bases at bunkers along the road between the airfield and Mount Suribachi. One bunker on either side of the island, they provide cover while the Japanese Bunker has a good view of the US fleet and Landing Beach and an MG42/M2 Browning emplacement either for axis or allies. The Mount Suribachi Bunker is near to an east-facing coastal Defgun.
")
Airfield
Initially Japanese, this base provides whoever controls it with 2 tanks, either Shermans or Chi-Has, and 2 jeeps. Naturally, the base also spawns 2 aircraft either A6M Zero/F4U Corsair and Aichival/SBD either for axis or allies and has an anti-aircraft Flak 38 Emplacement. The base is surrounded by 3 coastal Defguns, one facing south, one west and another east.
Outcomes
— American victory
— American defeat
— Japanese victory
— Japanese defeat
| |||||||||||
Battlefield 1943
— Loading Screen Tip
Iwo Jima is a map featured in Battlefield 1943. It features a wide variety of combat, from long range to close quarters combat, and features boats, jeeps, tanks and fighters. The map emphasizes on close range combat around most of its flags, as there are many trenches, buildings and bunkers, as well as forested areas which prevent long range sight. Other wider areas open up to long range combat with a small range of hills and the prominent Mount Suribachi which provides a dominant view over most of the map.
Equipment
| Light vehicle(s) | |
| Main battle tank(s) | |
| Fixed-wing aircraft | |
| Naval vessel(s) | |
| Emplacement(s) | |
| Light vehicle(s) | |
| Main battle tank(s) | |
| Fixed-wing aircraft | |
| Naval vessel(s) | |
| Emplacement(s) | |
| Neutral | |
| Emplacement(s) | |
Carriers
The aircraft carriers are the starting points of the two factions. They consist of either the Shokaku (IJN) or the USS Enterprise (USMC). They spawn two fighters and four LCVPs. The Japanese aircraft carrier is closest to the Lighthouse, whilst the American one is closest to the Fishing village.
Fishing Village
The Fishing Village is a small concentration of buildings at the base of Mount Suribachi, and is the closest flag to the USMC carrier. This base is a very useful place to control, as it can be used as a base to quickly take the Mount Suribachi, Lighthouse and Bunker flags. The steep hills surrounding the beach also make it difficult for players to take out players landing at the flag on boats without exposing themselves. However, as no emplacements or vehicles spawn at the flag, it is difficult to defend against a determined ground or naval attack.
Lighthouse


Trenches and flag near the lighthouse
The Lighthouse flag is the closest flag to the IJN carrier. Capturing the lighthouse flag allows players to easily access the lighthouse, which is a prominent feature giving good visibility over the northern side of the island. However, this also means that any player trying to use it as a sniping point can find themselves heavily exposed.
The trenches around the flag grant the defending side valuable cover against attacking troops, and also make it difficult for any attacking side to place a manned tank near to the flag without the tank becoming stuck in the trenches. There is an M1919 Browning machine gun that spawns near to the flag, making it easier to defend than the Fishing Village flag. No vehicles spawn at the flag, although there is a close by bunker with a Type 95 Kurogane spawning next to it.
Mount Suribachi


American forces assaulting Mount Suribachi
Mount Suribachi dominates the island, and is the highest point on the map. Several bunkers, machine guns and sandbagged positions makes a frontal assault on the mountain difficult, but flank routes along the sides and back of the mountain allow attackers to bypass the frontal defences, and the lack of air defences towards the seaward side of the mountain makes an insertion via a fighter easy.
It is a key vantage point for Scouts and for domination of the map, and it is very useful as a staging ground for further attacks, as tank drivers and Scouts can use the excellent visibility to eliminate any defenders and defences. When captured, three M1919s, one 40mm Bofors, two jeeps and one tank spawn, with the tank and jeeps changing depending on which team controls the flag.
Airfield
The Airfield is the most important point on the map, yet it is one of the most difficult to defend for a long period of time. It houses the largest amount of land vehicles, with two jeeps and two tanks and an extra fighter spawning when captured, as well as two 40mm Bofors AA guns and the Air Raid Bunker placed there, making controlling the flag crucial to both sides. Though heavily fortified with emplacements, it is surrounded by dense vegetation and large buildings, meaning infiltrators can bypass any defending players to capture the flag.
As well, the flag is placed within a large building that can be captured from within or atop the building, further making it difficult to defend. However, it also has a concrete bunker, facing towards the Bunker flag, and two guard towers overlooking the air strip, making it difficult for any vehicles to assault the flag without being spotted. It is notable for close-quarters engagements and vehicle warfare, making Infantrymen essential. Surrounding it are many buildings. Usually they have no action, but can be a fairly good to destroy tanks with grenades and anti-tank weapons. Also surrounding it, a large mountain. This is a great place for sniping because you are safe from riflemen and infantrymen, and if you are sniped, you can hide behind the cliff.
Bunkers
The Bunkers is an isolated flag along the southern edge of the island, though is more easily accessed by the USMC from their carrier. Players using an LCVP can make a quick detour to get an early start on this flag. It is in a critical position, as the holders of the flag can easily defend the Airfield from the direction of Mt. Suribachi. Defenders of the flag have two bunkers, one of which is equipped with an M1919, to defend from, as well as trenches and sandbags, making it difficult to attack, and the IJN can use it to have a clear line-of-sight on launched LCVPs and fighters from the USMC carrier.
Both sides can use the flag as a point to launch attacks on the Airfield or defend the approaches towards the same area. Since the area is built up with a notable amount of trenches and small bunkers, explosives such as hand grenades and rifle grenades are very effective against infantry, while the tight confines of the area makes ambushing vehicles easy. No vehicles spawn at this flag, although a Willys MB spawns next to the tower by the beach close to the flag.
| ||||||||
Trivia
- In Battlefield 1943 on the smaller of the islands between Mount Suribachi and the Japanese aircraft carrier on the side closest to Mount Suribachi etched in the sand is the phrase "Haggard was Here". The sandcastle with the Swedish flag (found on all maps in the game, as well as in Atacama Desert on Battlefield: Bad Company 2) is located on one of the small islands near the USMC Carrier.