| Incoming! The subject of this article is a recent or unreleased addition to a Battlefield game. It may contain speculation or errors. Have new, relevant information to add? Why not help out? |
St. Quentin Scar is a multiplayer map featured in Battlefield 1.[1] The map is set in the Battle of St. Quentin, during the initial stages of the major German offensive Operation Michael, located in Northern France, where German troops attempt to push through British defenses.
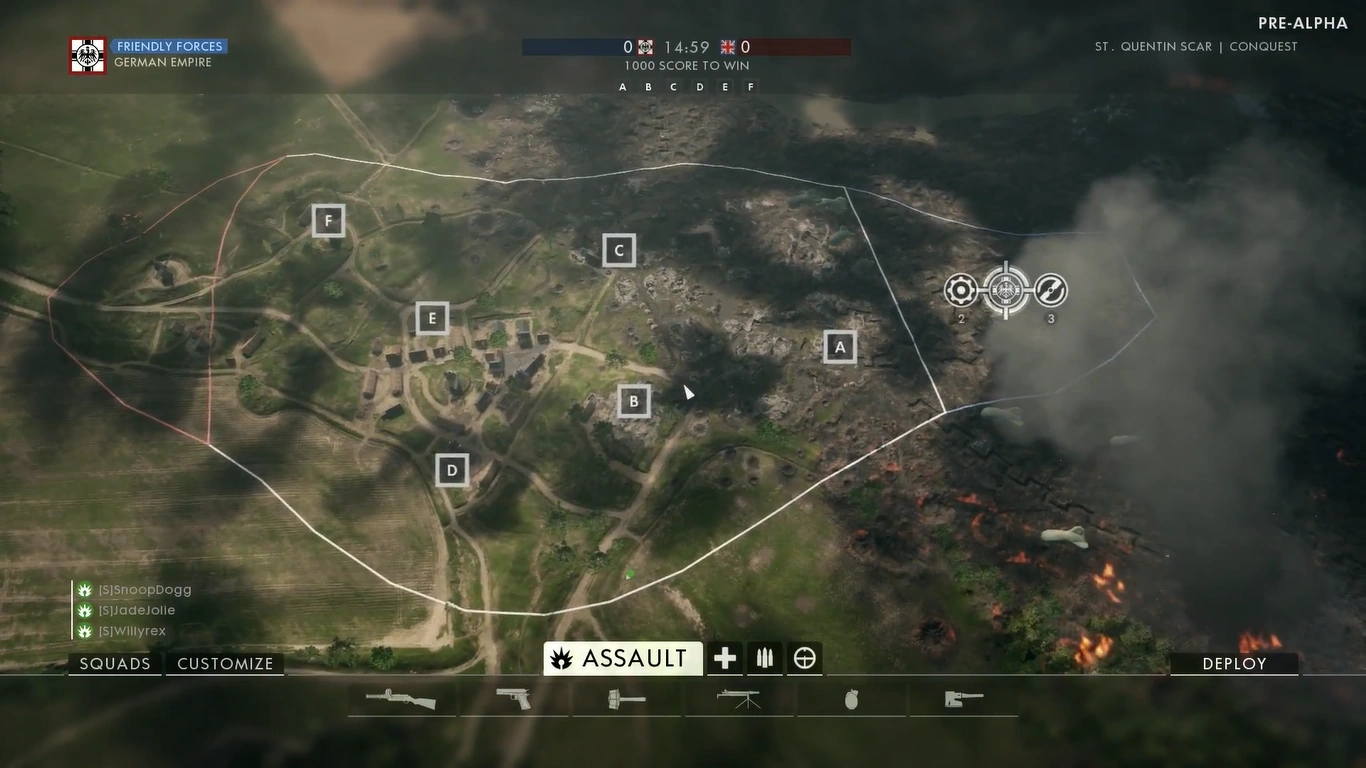
This map was featured in the closed alpha of Battlefield 1.
Overview
St. Quentin Scar takes place in a rural stretch of the French countryside. The village of Travecy sits directly in the map center, with other objectives on the outskirts connected by roads to the main service route running horizontally along the map's center. As the map is situated on the front-line, the contrast between the brown smudge of trenches, shell craters and scorched earth to the north-east, the grassy green farmland of the south-west and the grey blocks of the town between the two is immediately visible, with terrain changing considerably as one traverses the map. Amiens and its cathedral can be seen engulfed in smoke in the distance to the south-west.
Behemoth
The Behemoth of this map is the Airship L30, spawning over the respective team's deployment.
Control Points
| Control Point (Alpha name) |
Conquest | Domination | Rush | Operations |
|---|---|---|---|---|
| Petticoat Trench | 1B | |||
| Venture Farm (Burning Mill) |
A | 2B | ||
| Travecy Abbey (Monastery) |
B | 3B | ||
| Sunken Roads (Ruined Village) |
C | 3A | ||
| Hotel de Ville (Townhouse) |
D | C | 4C | |
| (Residence) | B | |||
| Baker's Meadow (Backyard) |
E | A | ||
| Ronquenet Farm (Windmill) |
F | 5A | ||
| Voyaux Farm | 5B | |||
| Orchard Post | 1A | |||
| Loaf Ridge | 2A | |||
| Windmill Crossing | 4A | |||
| Travecy Square | 4B |
Conquest

Combat during Conquest on St. Quentin Scar is diverse—the gently rolling hills, fields and roads of the map outskirts provide open sightlines suited to long range and armored vehicle gameplay in the gaps between objectives, while the highly urbanized terrain of the map centerpiece and the objectives themselves often cater to close-quarters infantry combat, forming a trap for any tanks following the main road through the town. The abundance of available aircraft round out the combined arms experience. There are six objectives in Conquest.
Equipment
| Light vehicle(s) | |
| Tank(s) | |
| Fixed-wing aircraft | |
| Light vehicle(s) | |
| Tank(s) | |
| Fixed-wing aircraft | |
| Neutral | |
| Self-propelled artillery |
Airship L30 (Behemoth) |
| Emplacement(s) | |
| Battle pickup(s) | |
Deployments
In Conquest, the British Empire spawns on the southern edge and the German Empire on the northern edge.
German Deployment


The German team starts within a set of battered fortifications to the north-east. A morass of trenches and pillboxes span the churned landscape, with barrage balloons listing above the lines. A muddy road winds south-east past the closest objective, Venture Farm, towards the crossroads outside the Travercy Abbey. Two QF 1 AA guns stand alongside the trenches at the back of the German spawn.
British Deployment


The British team starts on pristine farmland to the south-west, with an intact windmill and a cluster of farm buildings adjacent to a junction, with one path leading north-west towards the nearest objective, Ronquenet Farm, and the other consisting of the main road leading north towards the town. Two QF 1 AA emplacements and a field gun spawn close by to the windmill, allowing the British to defend their base sector.
Flags
The six flags are arranged in a triangle, with flag A to the east, C and D forming a midline, and F to the west. A motorcyle and a scout car spawn on each flag once captured.
Venture Farm


Venture Farm is situated within an artillery bastion on a hill on the eastern outskirts of the town. A number of field guns sit in wide dugouts lined with sandbags and surrounded by concertina wire and wooden holdfasts. Next to the flag itself is the objective's most prominent feature—a partially collapsed windmill, presumably demolished in the crossfire.
A QF 1 AA gun sits by the howitzers in the south dugout while a Maxim MG is emplaced next to the windmill, overwatching the western approach to the objective. A similarly oriented FK 96 is found slightly further downhill. Once captured by the Germans, this flag provides a spawn location for an extra two tanks.
Travecy Abbey


Travecy Abbey is located by a crossroads of roadways leading from the town, the Sunken Roads, and the German spawn. The flag itself is found within the exposed foundation of the destroyed monastery. A perimeter of partially collapsed walls protect those in the capture zone, in addition to a number of pillars and wooden beams from the collapsed roof inside the monastery itself. Two damaged farm buildings to the north and south-west block the defender's line of sight, and can grant strong fighting positions, provided they stay standing. A hillside to the west overlooks the center of the map, offering high ground for defenders, but potentially concealing approach from those inside the monastery. More hills to the south allow sight onto the Townhouse and parts of the town.
Maxim Guns without gunshields are emplaced at some of the windows of the destroyed monastery, in addition to one with shields on the crest of the hill to the south-west. A QF 1 AA is emplaced outside the eastern wall.
Sunken Roads


Sunken Roads is set in a township on the edge of the frontline - as such, little has survived intact. A number of gutted stone bungalows are placed directly around the flag itself, while larger, two-story brick buildings in a similar state line the road to the east and north-west. The capture zone is littered with piles of stone debris and half-standing walls, of limited directional use as cover. As most of the buildings are missing roofs, the two-story buildings provide a useful elevated firing position, but are missing walls themselves, leaving those exploiting the higher ground somewhat vulnerable. Some of the walls resist further destruction, preventing the area from being completely stripped of cover.
Hotel de Ville


The Hotel de Ville townhouse is found on the southern side of the map. The capture zone is found in a walled courtyard behind the townhouse, with a barn forming the east edge. Roads leading to the flag from the north and west are almost completely enclosed by buildings, leading inevitably for house-to-house fighting to reach the objective. Mouse-holing to avoid the cover-devoid streets and courtyards is advised, as dominant elevated positions on the top floor of the house, in addition to a nearby windmill, ensure these locations, as well as the fields to the south, are vulnerable to fire.
On Conquest, an FK 96 is emplaced behind a ring of sandbags on the road outside the townhouses' front door, while another FK 96 as well as a QF 1 AA is set up around the windmill in the center of town.
Baker's Meadow


Baker's Meadow is located on the northern side of town. As with Hotel de Ville, Baker's Meadow is surrounded on three sides by residential and auxiliary structures, with only the northern approach bordering open fields. A network of alleyways run between buildings either side of the comparatively open capture zone—a square yard covered in grass.
On Conquest, an FK 96 can be found in the middle of the intersection on the eastern edge of the town, overwatching the roads leading in from Monastery and Ruined Village.
Ronquenet Farm


A Conquest flag is situated next to yet another windmill on the north-west side of the map. The intact windmill sits on a raised hillock next to a farm courtyard, with a barn and a rural homestead lying on the northern perimeter. The surrounding fields and roads leading up to the flag are almost completely devoid of cover, save for some ditches and farm fences, making the windmill an ample spot for defense. Around the flag itself, the open courtyard provides little cover, with the buildings again being the safest, if not the sturdiest, option. The courtyard is, however, isolated from much of the map by its elevation.
A QF 1 AA is located on a mound south-east of the capture radius, while an FK 96 is found in the courtyard facing the southern road. A Maxim gun is found further down the same road. If held by the British team, this flag provides an additional two spawns for tanks.
Operations
The first half of Kaiserschlacht takes place in St. Quentin Scar in 1918. The German Empire seeks to break out of the no-man's-land of the Péronne Sector and capture Travecy, which is currently held by the British Empire.
Sector 1
Germans start their offensive by leaving their own trenches and charging through no-man's-land to the British trenches about 100m away. Two objectives are located in this sector. Objective A is Orchard Post, a trench line on the north-west side of the sector that runs what was once a row of houses. An FK 96 is set up on the north-east corner of the position, for defense against German tanks. Objective B is the Petticoat Trench, a strongpoint oriented around a concrete pillbox to the south-east. Here, trenches are staggered uphill, with a QF 1 AA gun emplaced behind the main defenses. Another FK 96 field gun is set up to the north-west, between the two objectives. Additionally, a number of machine guns are emplaced at intervals along the line.
The Germans are outfitted with two tanks, a horse, and two planes for their assault. The British receive only one plane, and must rely on their stationary guns to even the odds.
Sector 2
After the front line is breached, the Germans continue their advance through rest of the trenches and start to fight to the top of the ridge. The defender's second line consists of Objective A, Loaf Ridge, to the north-west, and Objective B, Venture Farm, uphill to the south-east. Loaf Ridge is a much more ramshackle set of defenses, with wide, shallow trenches constructed around more ruined residences, while the high ground around Venture Farm more favors the British. A QF 1 AA gun is found near Venture farm, while a field gun can each by found near both objectives. The pillboxes by each point are bristling with machine guns, and can put up significant resistance.
At this objective, the British receive a tank to help with the defense. The Germans, meanwhile, gain the support of a Sentry, which can be picked up from the west side of Petticoat trench.
Sector 3
After the ridge, the fighting continues downhill, through a broken abbey and a decimated town. In this sector, Objective A is found within Sunken Roads to the north-west, and Objective B is inside Travercy Abbey to the south. Each objective has its own FK 96 field gun nearby for defense.
At this stage, the defenders receive an additional plane.
Sector 4
At sector 4, the British retreat to the main town itself - the next point of attack for the Germans. Three Objectives lie inside the town limits. Objective A, Windmill Crossing, is the furthest afield, and is at the end of the main boulevard on the west side of town. It is concentrated around a roadblock opposite the windmill park. Objective B, Travercy Square, is within a walled courtyard on the north-east side of town. Objective C, Hotel de Ville, is the townhouse to the south.
Sector 5
After the town is taken by the Germans, only two windmills are left to be taken. Objective A is Ronquenet Farm, on a hillock overlooking the town to the north-west. Objective B is on the opposite side of the main road, directly south of Ronquenet. A QF 1 AA gun is emplaced here.
After securing this sector, the British defenders are routed, with the victorious German troops now unbarred in their advance towards the suburbs of Amiens.
Rush
In Rush, the German forces must push west through no-man's-land and the trenches to reach the town of Travercy and beyond, destroying British communication posts along the way.
Sector 1
In the initial phase of the battle, the Germans deploy from the north-eastern edge of the map, while British spawn in the secondary trench line advance of Venture farm. Objective A and B are within the same first line of zig-zag trenches. Objective B is outside to the north of the front while A is inside a pillbox further south. A number of machine guns and field guns are emplaced along this defensive line.
The German Empire has access to a single tank, a KFT Scout car and a Sentry kit at this stage, while the British have no vehicles.
Sector 2
The next phase is concentrated around the northern end of the secondary trench line. Objective A is closer to the Venture Farm windmill, while Objective B is in a dugout beneath three barrage balloons. Pillboxes containing MGs, and more field guns can be found in the vicinity of each objective.
At this point, the British receive one tank for defense, while the Germans have their Scout Car removed.
Sector 3
The next set of objectives is in the devastated suburb of Sunken Roads. Objective A is in a ruin on the east side of town, while objective B is in the ground floor of the intact two-storey house further west. Field guns stand opposite the main road leading through the area, but their line of sight is limited by the surrounding ruined structures.
The British defenders receive the Sentry kit for improved infantry fighting capability.
Sector 4
The last attack is launched against the town of Travercy proper. Objective A is in the ground floor of a house on the north side of town, opposite Travercy Square. Objective B is inside the windmill in the grassy area in the center of the town.
The defenders receive retain their one tank for defense in the final phase, as well as the Flame Trooper.
Team Deathmatch
The map boundaries of Team Deathmatch limit the play area to Travercy itself, in a similar fashion to Domination.
War Pigeons
War Pigeons takes place in the same area as Team Deathmatch.
| ||||||||||||||||||||
References
|