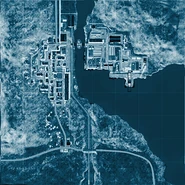
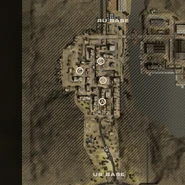
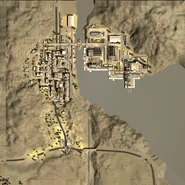
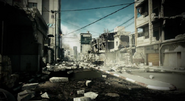
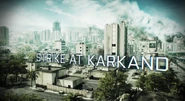
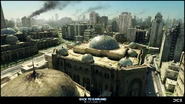
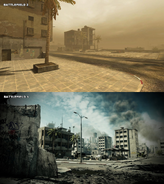
Strike at Karkand is an urban combat map featured in many installments of the Battlefield series. It is based on an industrial region within Kuwait City, Kuwait.
Battlefield 2
Description
"Control of the industrial facility and harbor at Karkand motivate this assault by US forces, where they find MEC forces marshaling to defend the industrial city and determined to meet this attack with stiff resistance. The terrain surrounding Karkand sufficiently opens to allow for sweeping fields of fire but the open ground increases the danger Posed by anti-vehicle missiles and sniping. It is thus vital for both sides to secure firebases in Karkand’s sheltered city center."
Flags
Gas Station
The starting uncap flag for the USMC, there are three spawn points for it - one at the very south of the map (where most US vehicles are located), and two to the northeast and northwest. Spawning at the two front points, the US team may attack the Hotel on either side, or send team members into the mountains or alley where they can continue on to the critical Suburb or Train Accident, respectively. As most servers prohibit spawn trapping except for destroying commander assets, there is rarely any action in the area surrounding the actual gas station.
- M249 SAW
- There is one LMG at each of the spawn points
- TOW
- The TOW is located at the northwest spawnpoint
- HMMWV
- There is one at the gas station, and another near the building at the northwest spawn
- LAV-25
- M1A2
Hotel
The southernmost MEC spawnpoint and closest to the USMC's uncapturable flag, the flag is situated in front of a hotel's front door, and is accessible by ladders on either side, or the most direct and fastest route, the stairs in front. It's generally wise to have an entire squad on the flag when capturing it, as enemy troops can spawn on 3 sides. The flag may also be captured if the player stands inside and/or on top of the telephone booth in front of the building. (Available on all maps)
- RPK-74 LMG/M249 SAW
- Faces south toward the road leading from the Gas Station
- Player is extremely vulnerable to snipers in the uncap, and enemies may sneak up on the wielder through the alleyway in back of the LMG
Square
Only a few feet north of the Hotel, the capture area can be entered through a hole in the wall east of the flag, the direct opening facing the Hotel, or around the back of the building that marks the square. Players can stand outside the wall to capture the flag, but must take care as the enemy can spawn right in front of them. The enemy may also spawn in the pathway coming from the back of the building. (Available on all maps)
- RPK-74 LMG/M249 SAW
- Faces south and can sweep across both streets leading to the Square
- Player is has no protection from attacks from behind
- TOW/HJ-8
- Take caution of the exploding barrel to the left of the launcher
- HMMWV/Vodnik
Market
Situated on the street below the Square, this flag can be defended more easily than others, as the market stands give a considerable amount of protection against most small arms fire. (Available on 16 and 32 player maps)
- RPK-74 LMG/M249 SAW
- Faces south towards the Square and is housed in a slightly large market stall
- Player is prone to enemies advancing from the area between the Suburbs and Train Accident, and there is an explosive barrel to the left of the gun
- TOW/HJ-8
- HMMWV/Vodnik
Suburb
The farthest flag to the west, an early USMC capture of this flag can help turn the tide of battle. USMC players can reach this point without much direct confrontation by traversing the hills. In addition to standing around the flag, one can climb atop the building and capture the flag by crouching in the corner of the sandbag barrier.(Available on 32 and 64 player maps)
Train Accident
Possibly the most critical flag on the 64 player sized map, controlling this point can help split the map in two. USMC players can go down the alley to the east of the Hotel and Square to reach this faster, but it's hard to pass this way when a considerable amount of MEC soldiers is defending the general area. The capture area has two explosive barrels, so it's best to deal with these before getting close to the flag.(Available on 32 and 64 player maps)
Gatehouse
Northernmost flag on the map, it's easily accessed by crossing the bridge connecting the Train Station and the west part of the map.(Available on 32 and 64 player maps)
- RPK-74 LMG/M249 SAW
- The LMG is located in the building next to the bridge, but firing range is limited due to the bridge column blocking the left side.
- TOW/HJ-8
- HMMWV/Vodnik
Cement Factory
The flag to the south of Gatehouse, the direct path to this flag is a partly submerged crossing at the south end of the Train Accident. One may also go around the side of the strip (which connects the Gatehouse to the Cement Factory), where they will find a ramp leading to the back of the area. The team in control can defend this point numerous way, such as sitting at the LMG behind the flag, hiding behind the crates, or hiding in the small warehouse. (Available on 64 player map only)
- RPK-74 LMG/M249 SAW
- This LMG sits directly in back of the flag, and will allow the operator to intercept any enemies entering the area on ground level.
- Being positioned in a corner, the operator has protection from anything that does not cause substantial area-of-effect damage (C4 and tank rounds may injure the operator)
- TOW/HJ-8
- HMMWV/Vodnik
Warehouse
The warehouse lies in the center of the map's eastern section, therefore giving the team in control of it quick access to the surrounding 3 flag. However, the team in control must also remember that enemies may enter from the back, front, and side, meaning a full squad would be an ideal minimum in order to defend the flag.(Available on 64 player map only)
- TOW/HJ-8
- There are two LMGs in 64 player maps, but are situated on either side of the flag, providing substantial defense against frontal and rear assaults. Beware the exploding barrels near them.
- HMMWV/Vodnik
Factory
The easternmost flag, this flag houses the commander assets on the 64 player sized map. The offensive team can sneak around the back of the building and attack unsuspecting defenders.(Available on 64 player map only)
- RPK-74 LMG/M249 SAW
- Both LMGs lie in guard posts, providing defense against enemies launching frontal assaults on the point
- TOW/HJ-8
- LAV-25/BTR-90
- M1A2/T-90
Commander Assets
USMC
UAV Trailer- Behind the west building at Gas Station
Radar Station- South of the gas station itself, next to the fenced area
Artillery Guns- Dispersed across the area surrounding the northeast 'uncap' spawn point.
MEC
UAV Trailer-
- 16-Player Map - East side of Market
- 32-Player Map - Northeast side of the Gatehouse
- 64-Player Map - On the road between the Factory and Warehouse
Radar Station-
- 16-Player Map - West side of Market
- 32-Player Map - Southwest side of the Gatehouse
- 64-Player Map - Player Map Nearby the Factory
Artillery Guns-
- 16-Player Map - Centered around Market
- 32-Player Map - Centered around Gatehouse
- 64-Player Map - Centered around Factory
Strategic Points
Suburbs
One of the most strategic points is the Suburbs. Suburbs contains passage through The Square and Train Accident and has a machine gun emplacement on the rooftop and an anti-tank emplacement. Suburbs contains several sniping positions and has a perfect rugged cliffs which gives a perfect spot for machine guns and vehicles to pin advancing opposing teams. Suburbs downhill roads gives the troops the opportunity to spam their opponents with grenades and gun fire. Its gives the advantage for the forces to outflank their enemy from Square or to Train Accident.
Factory
The Factory contains all the MEC's assets including 2 Defensive Machine Gun Watch Towers protecting both passages to The Factory from enemy offensives and has a secret passage to get to the Factory's rooftop, a perfect spot for an entire squad to flank enemy troops from far distance. Its gives the advantage to begin full strength offensives to capture Warehouse, Gatehouse and Cement Factory.
Warehouse
Warehouse is one of the best strategic points on the entire map. It contains two Mounted Machine Guns both at front and back of the flag, It has a catwalk just behind and left side of the flag inside the warehouse it includes a small open entrance in the right side. The Warehouse is a perfect stronghold for a Losing or Winning team, but it contains several Flank points making it easier for the opposing team to capture the Warehouse but it may be countered by defending the weakest positions at all times.
Gallery
| |||||||||||||||||
Battlefield 2142
Strike at Karkand is a map featured in Battlefield 2142 that was added in the 1.51 patch. The map is similar to its Battlefield 2 counterpart, with the main differences being that the environment is colder, snow is falling, and the player plays with the technology and classes of Battlefield 2142. The EU takes the spot of the USMC and the PAC takes the spot of the MEC also.
Description
"EU intelligence has reported the location of a PAC Titan manufacturing plant hidden away from the front lines in the region known as Karkand. The EU forces have a chance to severely impact the PAC war effort by taking control of the region and the Titan factory within."
Equipment
| Attackers | |
| Light vehicle(s) | |
| Infantry fighting vehicle(s) | |
| Main battle tank(s) | |
| Emplacement(s) | |
| Defenders | |
| Light vehicle(s) | |
| Infantry fighting vehicle(s) | |
| Main battle tank(s) | |
| Emplacement(s) | |
| |||||||||||
Battlefield Online
- Main article: Battlefield Online#Strike at Karkand
| |||||
Battlefield Play4Free
Karkand is a map featured in Battlefield Play4Free. It is based on the 16-players variant from Battlefield 2, but has four control points and two uncapturable bases - one for each team, rather than three control points and one uncapturable base. The two factions differ only in that the United States Marine Corps fights the Russian Army rather than the Middle Eastern Coalition.
Description
"Using light and heavy armor units the Marine and Russian forces hope to get a foothold in the valuable industrial city of Karkand."
Flags
US Base
The USMC spawn point is situated on the hill at the southern side of the map. The base is closer to the city compared to Battlefield 2 and allows a much quicker attack of the first flags. US vehicles' spawn is situated slightly backward than infantry spawn; the convoy is made up of one M1A2 Abrams, one LAV-25 and two HMMWV. A third Humvee is located on the left of the street in the backyard of a house. There are two main spawn points divided by the central street: the one on the right is where most of the team spawns, the left spawn is very close to the Humvee which should be used to quickly reach the B flag.
A: Hotel
The flag is situated in front of a hotel's front door, and is accessible by ladders on either side, or the most direct and fastest route, the stairs in front. It is the closest flag to the US Base and the first usually captured by this team. This flag can be easily defended from the top of the building situated in front of the hotel. Near the flag is located a TOW to defend the central street.
B: Square
This flag retains its position from the Battlefield 2 16-players variant of the map. The square is a very open area with long lines of sight and usually heavy vehicles or at least smoke grenades are needed to secure this position. Being the central flag it is very crucial and controlling it can help winning the match; here is where most of the combat takes place and there are several camping spots and flanking routes. The spawn points depend on what team controls this flag: the USMC spawns are on top or inside the two story building at the southern side of the square, in the south-east building corner near the hallway and on the second floor of the building located at south-west; Russian spawns are in the backyard at the west side of the square, downstairs near the flag and on the north-east side of the square. Common tactics to capture this flag include using the several boxes present as cover, crouching in a hole in the ground or standing as closest as possible to the west side building to reduce enemy's lines of sight.
C: Fountain
Unlike Battlefield 2, where this flag was placed on the hill with villas, this flag is situated in the small square with the fountain down the street from the suburbs, as in the 32-player variant of Conquest in BF3. This makes capturing the flag a lot harder as there are several spots to look at it: these include the buildings at the north, west and south sides of the flag, that give a clear line of sight on the square below. However the central fountain gives a good cover when trying to capture this flag and also vehicles can be used to secure the position; to avoid this there are two HJ-8's (or TOW's if controlled by USMC). This flag is closer to the Russian spawn and it is usually taken first by this team.
D: Market
This flag retains its position from the Battlefield 2 16-players variant of the map. While the control position is located in the centre of the street which is a quite open space, the market itself is a very close area, with small alleys and several flanking routes. However the rooftops give longer lines of sight over the streets below, making them an ideal spot for snipers. This flag is closer to the Russian spawn an it is usually the first flag that this team holds.
RU Base
The Russian spawn takes the place of the Train Accident flag from Battlefield 2. The base is closer to the D and C flags but players can also quickly reach the square using light vehicles. A T-90, a BTR-90, and three GAZ-3937 Vodniks are located in the parking lot north of the train.
Rush
Karkand is now the second map to be released for the Rush game mode after Sharqi. The Rush variant of Karkand takes place in the evening, just like Mashtuur, unlike in the afternoon of the Conquest variant. The Rush variant also includes more pieces of cover for players to take cover in, such as crates and craters on the roads.
Unlike Sharqi however, there are only four bases as opposed to five in the former.
The United States Marine Corps are the attackers, while the Russian Ground Forces are the defenders. The attackers have 100 tickets for each base.
Equipment
| Light vehicle(s) | |
| Infantry fighting vehicle(s) | |
| Main battle tank(s) | |
| Helicopters(s) | |
| Light vehicle(s) | |
| Infantry fighting vehicle(s) | |
| Main battle tank(s) | |
Attackers Deployment
The attackers deployment is located right to the left of where Flag A used to be.
Base 1
There are two M-COMs located right between where Flags A and B used to be.
M-COM Alpha is located near a destroyed M1 Abrams.
M-COM Bravo is located near supply crates right next to a radio tower.
Base 2
There are two M-COMs located around the area where Flag D used to be.
M-COM Alpha is located right where Flag D used to be. Nearby is a crater on the road along with the wreckage of a destroyed car.
M-COM Bravo is located much closer to where the RU Base used to be. Nearby is a destroyed train, a common sight from all other versions of Strike at Karkand.
Base 3
There are two M-COMs located across the bridge near where the RU Base used to be.
M-COM Alpha is located between an old factory, a metal fence, a work shack and some factory silos.
M-COM Bravo is also located near an old factory, below a bridge connecting the factory to a nearby warehouse.
Base 4
There are two M-COMs further behind the third set of M-COMs.
M-COM Alpha is located near a warehouse that was once used as the UAV Trailer in the 64-player variant of Battlefield 2's map version.
M-COM Bravo is located inside a warehouse near a large factory.
Gallery
| ||||||||
Battlefield 3
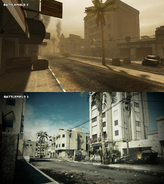
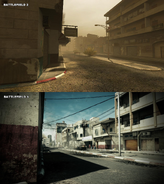
Strike at Karkand returned in Battlefield 3 via the Back to Karkand expansion pack. It was re-imagined with the Frostbite 2 engine and is playable on all game modes. Strike at Karkand, like the other maps, is significantly more war-torn, with a background city-landscape that was not present in Battlefield 2's version of Karkand.
Flags - 64 player variant
US Deployment
The US deployment is not much more than a few houses on either side of a long road leading into the city. There is only a small line of trees blocking the lines of sight for teams to avoid combat. The deployment only contains two armored vehicles to strike the enemies guarding the city. US soldiers must act fast to avoid being pinned down at the road leading to the hotel as most to all of the RU soldiers set up an ambush at the Hotel. A good tactic to use when pinned down is to move along the rocks on the east side of the road and flank enemy flags to create an opening for allies to attack the defending Russians.
The following vehicles spawn here:
RU Deployment
A: Hotel
The Hotel is the first area of conflict in every match. Russian soldiers must set up a defensive line by the Hotel to stop the oncoming US armor and infantry. The tank and LAV are usually first to arrive at the Hotel beginning the attack. Mines should be placed along the road to counter the armor allowing the vehicles to inevitably blow up or be trapped at the deployment due to the only entrance for vehicles to be blocked off. The Hotel is usually defended by snipers at the Square who pick off infantry and laser designate enemy armor for AT soldiers. Once the US capture the Hotel it becomes a forward deployment zone and begins to lack combat.
B: Square
The B flag is located next to a tall building that has a ladder that leads to the rooftop and has a small market place in the middle with what appears to be a well. It is often protected by snipers and support troops on the buildings surrounding the flag. Much of the action takes place at this flag and is accessible by both vehicles and infantry, making it a hard flag to keep for long.
C: Market
The Market objective is located near the Square and is accessible from B by a flight of stairs. The surroundings are filled with buildings where infantry can hide and ambush any incoming hostiles, especially vehicles. Controlling B eases capturing and holding C because of the advantage position it has over that flag.
D: Suburb
Another strategic hotspot, as it is accessible directly from the US spawn by going to the side. It features multiple two-floored buildings with a road trailing through the middle, connecting points E and B. It also possesses a high ground, making the buildings and nearby terrain a common overwatch point for Recon players with sniper rifles. It also overlooks the C and B objectives. If somehow being defended, it's the hardest flag to capture.
E: Train
It's situated between the road that links the suburbs to the Gatehouse and the Warehouse. The wagons standing on the rail tracks provides good cover for the infantry defending the flag, but are always exposed to fire coming from F, G or D and C, depending on which side of the railway you are staying. The flag itself is easily accessible to vehicles, making it probably the most contested flag of the map.
F: Warehouse
G: Gatehouse
Act as the deployment of the Russian team, often the attackers will try to rush with their LAV-25 to this flag to it to gain the extra armored vehicles it provides. Here spawns 1 heavy and one light armored for any team that controls it.
Flags - 32 player variant
US Deployment
Same as in 64 player variant.
RU Deployment
A: Hotel
Same as in 64 player variant.
B: Square
Same as in 64 player variant.
C: Fountain
The Suburb flag from the 64-player map is moved down the road and closer to flag B (Square), in a smaller square mostly surrounded by tall buildings. It has close proximity to both the Square and Market flags, as well as controlling a road that leads straight to the Compound/Train, and access to an outside path to the Hotel and US Deployment. This makes it a crossroads of the city, and holding this flag can be very useful for mounting assaults on other key areas of the map. The villas on the hill overlooking the flag are a popular defense and lookout point for snipers and support gunners.
D: Market
The Market objective is located near the Square and is accessible from B by a flight of stairs. The surroundings are filled with buildings where infantry can hide and ambush any incoming hostiles, especially vehicles. Controlling B eases capturing and holding D because of the advantage position it has over that flag.
E: Compound
It's situated on the roads coming from both D and C. The railroad cars standing on the tracks provide good cover for the infantry defending the flag from attackers and give defenders opportunity to take enemies by surprise, but are not within the flag control radius itself. The flag itself is easily accessible to vehicles coming from the Market or Fountain.
Gallery
| ||||||||||||||||||||||||||
Trivia
Battlefield Play4Free
- In Battlefield Play4Free, when playing on low details settings, the fog makes it impossible to see over about fifty meters.
- In Battlefield Play4Free, the rush variant of the map is set at a darker evening time.
Battlefield 3
- In Battlefield 3, there is a radio in a building near base D playing the MEC loading theme.
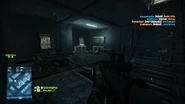
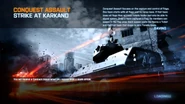
- At the very beginning of Conquest Assault matches, a F/A-18 will quickly pass right over the map and will bomb the hotel at the A flag. The explosion will create a considerable amount of rubble that may eventually kill any player in the capture radius (except for those hidden in the entrance).
- In Battlefield 3, the map has the same loading music as Tehran Highway.
- In Battlefield 3, the MAV coordinates state Karkand is located in Kuwait City, Kuwait. Based off the geography (water location, single road leading up to the city, etc.), it is safe to assume DICE based Karkand off the industrial area of Kuwait City.
- In Battlefield 3, cardboard boxes found in alleyways or the market C are marked MICE in the same font as the DICE logo. These boxes can also be found on Gulf of Oman and several other maps, as well as in Battlefield 4.
- In Battlefield 3, some cargo crates can be seen with the serial numbers "2143", which could be a hint at a future Battlefield 2143, as in the original version in Battlefield 2, many cars had license plates that said 2142, and the next game was Battlefield 2142. However, the next installment in the series turned out to be Battlefield 4.
- Near Flag A in Conquest Assault in Battlefield 3, there is a building with small windows. This building can be accessed by entering the building close by with a staircase. Jumping onto the awnings will allow the player to knife the window and jump in. This building has non-solid walls, and makes for a good vantage point overlooking Flag B. However, the building has a non-solid floor in the room near the flag. Falling in this will make movement impossible and change what the player can see. The only way out is to suicide.
- It is the only map in the Back to Karkand expansion map that does not feature aircraft, not counting the scripted dynamic event in the beginning of a Rush match.


