| This article is a stub. It is short and in need of fortification. Why not help out? |
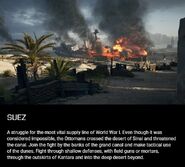
Suez is a map featured in Battlefield 1. It features the United Kingdom and Ottoman Empire factions in battle at Kantara, Egypt, site of the British Army's supply depot at the Suez Canal.
Overview
Suez is a map concentrated on the city of Kantara. It bears little resemblance to any of the battles in earlier Battlefield titles, long after the canal was expanded.
Behemoth
The map's Behemoth is the Armored Train. It runs along the canal to the west of the map, about 50 meters from Kantara.
Control Points
| Control Point | Conquest | Domination | Rush | Operations |
|---|---|---|---|---|
| Ferry Post | 1A | |||
| Oasis | Sector 1 | 1B | ||
| East Bank Trenches | A | Sector 2 | 2A | |
| Wireless Station | 2B | |||
| Kantara Redoubt | A | 3A | ||
| Southern Kantara | B | B | Sector 3 | 3B |
| Southern Outskirts | C | |||
| Central Redoubts | C | |||
| Northern Kantara | D | Sector 4 | 4A | |
| Hill 50 Battery | Sector 5 | 4B |
Conquest
Equipment
Deployments
British Deployment
The British Empire deploys from the south of trench maze aside a small Oasis.
Ottoman Deployment
Flags
East Bank Trenches
The East Bank trenches flag is located inside a maze of trenches constructed from within the desert. The trenches provide substantial cover from enemy fire with the surrounding area offering essentially no cover, creating a no man's land.
Southern Kantara
The flag is located in the town center of a small settlement. The capture radius for this flag only insides the two story building found beside the flag and the surrounding area. The large number of buildings provide many spots for enemy players to hide from paroling players. This forces players to be ever vigilant if the next adjacent flag is captured as it will be easy for enemies to sneak up and dispatch players. Unlike other areas of the map, the roofs of a few buildings within the settlement feature machine gun emplacements which are very effective at anti-personnel fire.
Central Redoubts
This flag is located in the center of the map, right after the outskirts of Southern Kantara, to the east of a large sand dune. This sand dune provides substantial cover from Northern Kantara and makes it exceptionally difficult for the Ottomans to capture this if not captured early. As a result, it is very common for defending players on the British team to take position on the top of the dune as snipers or mortar operators. A small stone structure surrounds the western side of the flag, providing cover from enemies who manage to make it on top of the sand dune. The Sentry Elite kit is located here as well as a Field Gun.
Northern Kantara
This flag is located in a small settlement similar to South Kantara. Unlike South Kantara, however, the flag is found along the main roadway running through the settlement. The majority of the capture radius lies outside the settlements buildings, forcing players to be actively searching for enemy players hiding within. These buildings also make ideal spots for players to dispatch defenders positioned on the sand dune aside Central Redoubts. Compared to the two adjacent flags, this flag lies on low ground and in close proximity to the railroad and is the the target for enemy snipers and armored train fire.
Operations
Suez is the second map in Oil of Empires in Operations. Similar to the previous map, Fao Fortress, the British Empire are the attackers while the Ottoman Empire are the defenders.
Sector 1
Ottoman forces take up positions around an oasis as British forces enter the area.
Sector 2
Sector 3
Sector 4
Gallery
| ||||||||||||||||||||
Trivia
- As of the pre-release event for YouTube hosts, the position of the sun in Conquest does not correspond to Suez' real life location, coming from the north.
- The map originally featured three flags, making it one of the smallest maps in the game. The November 2016 patch increased the number of Conquest flags to five, transforming the original British and Ottoman deployments into flags while pushing the new deployments further north and south respectively.

