White Pass is a map featured in Battlefield: Bad Company 2, available in Rush, Conquest and Squad Deathmatch. The US are defending a large satellite/communications hub from Russian airborne troops, who have landed in the northern Rocky Mountains and are attempting to destroy it. White Pass also appears to be the map featured in the E3 trailer for Battlefield: Bad Company 2, which was played on the Rush game mode.
Description[]
As the weather has cleared and snowfall relented, Russian Forces are massing for an assault on White Pass and the satellite relay station located there. The local town has not been attacked, but Russian units have probed defenses in the surrounding woods. The sector has strategic value to U.S Forces as it allows control of inland routes. Should the area fall into Russian hands, a line of advance will present itself directly to Nelson Bay.
Conquest[]
Equipment[]
| Light vehicle(s) | |
| Infantry fighting vehicle(s) | |
| Helicopters(s) | |
| Emplacement(s) | |
| Light vehicle(s) | |
| Infantry fighting vehicle(s) | |
| Helicopters(s) | |
| Emplacement(s) | |
Bases[]
US Deployment[]
The US Deployment is the starting base for the US. A M3A3 Bradley and a Quad Bike spawn here, as well as two XM312s along the hillside facing out towards Alpha.
RU Deployment[]
The RU Deployment is the starting area for the RU team, a BMD-3 and Quad Bike spawn here. A 9M133 Kornet spawns nearby the base. There are also two shielded KORDs that spawn along the tree line defending the base and Charlie.
Flags[]
A: Factory[]
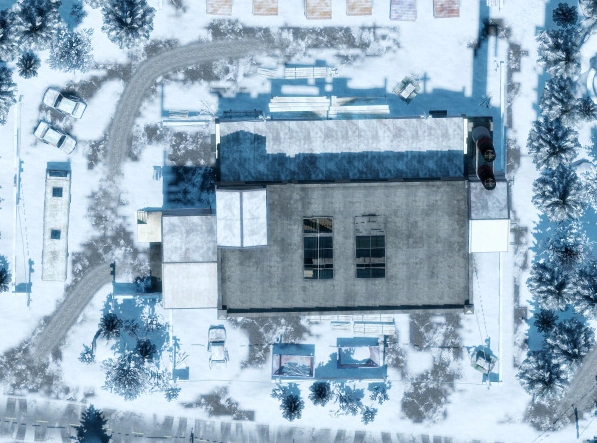
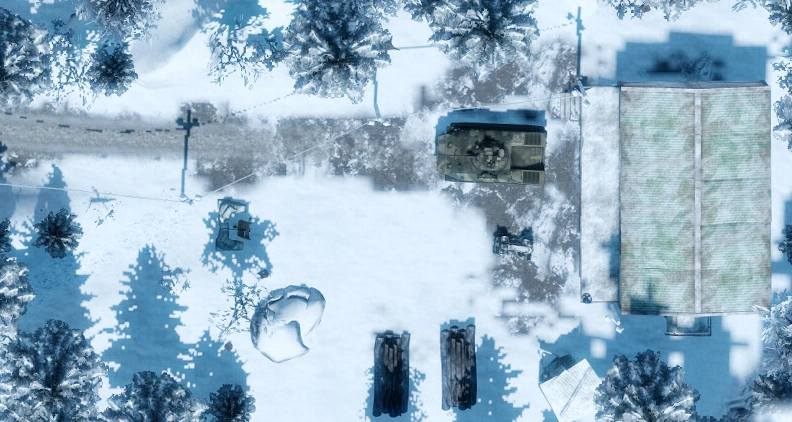
The closest control point to the US Deployment is The Factory. This features a factory with a large door and several smaller doors. It is surrounded by a supply yard and inside the factory is a stairwell that leads to the roof. A group of generators are located along the rear wall which players may use to take cover in while capturing the point, along with some small green dumpsters in the front and large blue dumpsters at the side. The tank on this map can fit in the large door at the front side and park itself inside to assist with capturing. A shielded XM312 spawns on the roof, but the trees in front of it must be cleared to allow it to have a better view. A 9M133 Kornet also spawns next to the under-construction building.
B: Town Center[]
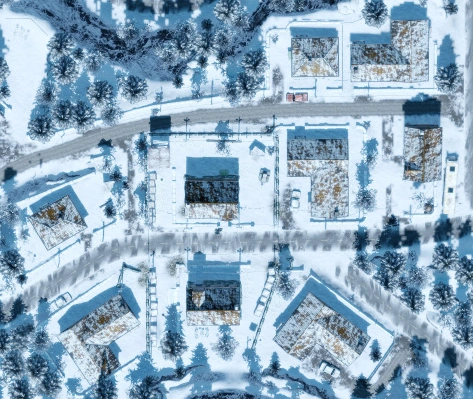
The Town Center control point is flanked by two large two-story houses that can be destroyed to deny the opponents cover and concealment while capturing the base. There is also a watchtower that is rarely used near the back road, and the UAV control box is located here near the stone wall and cliffs. The area has two roads that tank drivers can choose to take to get here quickly (although players usually take the more direct one, flanked by the two houses). Players may choose to camp the UAV-1 Station or bypass this base and proceed straight to Charlie or Alpha through the lower cliffs near the UAV or the upper cliffs along the bottom of the map. The small urban area here provides good choke points for the defending faction, allowing them to funnel the enemy into houses or kill them in the streets.
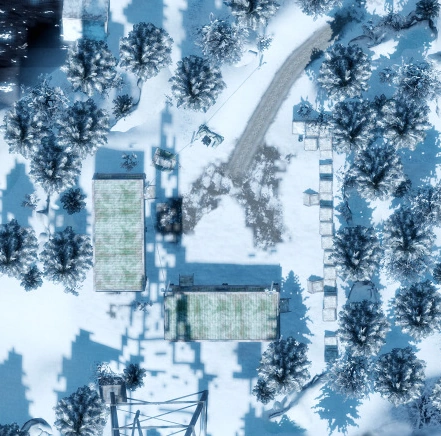
C: Farm[]
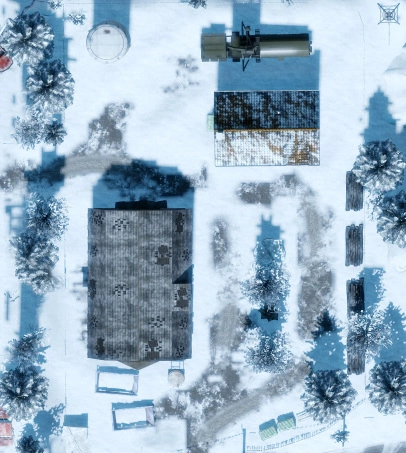
The closest control point to the RU deployment, the Farm, features a barn that has a shielded KORD heavy machine gun on the upper level. This point has a good overwatch of the road but is virtually useless otherwise due to the poor sightlines on the side windows and the rear opening not featuring any weaponry of any sorts.The rear of the interior of the barn at Charlie is especially vulnerable to opponents due to the openness of the room. This base is nearly surrounded by multiple houses with a courtyard-like area connected to a road leading to Bravo.
Rush[]
Equipment[]
| Emplacement(s) | |
| Emplacement(s) | |
Bases[]
US Deployment[]
Factory[]
This site focuses heavily on CQC. It is important to keep your squad and team alive as the respawn delay can cripple your team. Medics can achieve a high score on just this first base alone. The attackers spawn on a hill that leads down to the MCOM stations. There are 3 ways that attackers can take: 1) down the main road to the building 2) down the cliffside and behind a building undergoing construction and 3) through woods that will eventually lead to the defenders spawn. Both bombs need to be activated as the building containing them cannot be destroyed with destruction 2.0. The A bomb is located on the second floor in between 2 shelves. Out of the two bombs this focuses the most on CQC. The B bomb is located on the first floor and can be very hard to plant/defend as the attackers may have a height advantage thus allowing rockets/grenade launchers to do maximum damage.
The defenders have very little space to move in proximity to the map as this may be one of the smallest playable areas to defend. This makes it especially stressful for attackers since defenders can wait instead of having to move and anticipate.
Sniping for both teams can be quite effective, but the lethality of mortar strikes is diminished as the building containing the MCOM stations cannot be destroyed. A recon using motion sensors can do a great deal of damage to either team as this base is so small that a motion sensor will cover at least a quarter of the map.
Town Center[]
After the factory is lost/taken the Town Center base is unlocked. This base contains one M-COM in a building and the other outside. The building with the M-COM can be destroyed by Destruction 2.0 so it is heavily encouraged for the attackers to destroy the M-COM outside. Although there is not as much CQC as The Factory CQC weapons can still be used with high effectiveness. At this point reviving will not be as crucial as it was in The Factory. The cliff on the right side of the map, per the attackers, can provide a great vantage point to look into the defenders spawn. Although not critical this hill should be kept under either sides control to help win the battle and either advance or hold the attack. There are some lines of sights that attackers should be wary of and the defenders are able to hole up in buildings allowing for a stronger defense.
Farm[]
The final base for the attackers to take can be quite difficult. Just like The Town, one M-COM is located in a Destruction 2.0 building while the other is located outside. Unlike The Town the outside M-COM is located in the back of the building instead of alongside it. This can make it especially hard for the attackers to take this bomb. Another added difficulty is that the defenders spawn is located immediately behind this bomb allowing for instant retaliation. A coordinated attack is especially important for this bomb.
There are two main ways to secure the outside bomb: 1) work around the cliffs on the right side of the map and try to take the enemy from behind by surprise or 2) the more head on frontal attack push along the low ledge on the left side of the map. Expect heavy casualties here and extremely CQC. If defenders see attackers advancing along the second route it is vital to take the medic out as there large clips plus able to revive teammates can cruple the defense.
The building in front of this M-COM does not have to much effect on the outcome of this battle. Destroying it gives on less spot for defenders to be but can increase LOS on the left flank for the attackers. Smoke can be used quite effectively here to cover the attackers advance.
Squad Deathmatch[]
The playing area takes place at the Town Center. Unlike the other versions of the map, it takes place during a different time of day, which is why the lighting is different for Squad Deathmatch.
Outcome[]
A column of M3A3 Bradleys arrive and the Russians are pushed back.
The Communications Hub is destroyed and the Americans are pushed back.
Gallery[]
")
Trivia[]
- At the beginning of the loading theme, a woman's voice can be heard saying "Obviously the people that work here don't know what they're talking about."
| ||||||||||||||||||||